Automatic Text Recognition (ATR)- Pre-Processing and Image Optimisation
This tutorial is dedicated to image optimisation as part of pre-processing. It covers the scanning process and what you need to be aware of while engaged in it. It looks at the possible image pre-processing steps such as cropping or dewarping as well as the potential difficulties that can arise in the pre-processing stage.
This is the English version of this training module. The video is available with English, French and German subtitles.
Si vous souhaitez accéder à la version française du module, rendez-vous ici.
Die deutsche Version der u.s. Lerneinheit ist hier verfügbar.
Learning outcomes
After completing this resource, learners will be able to:
- identify the elements defining the quality of their scanned images
- improve them if necessary
- assess if such an improvement phase makes sense for their project
- get started with a software like GIMP.
1. Digitization Concepts
With the help of optical systems such as scanners, cameras or similar devices, a digital image can be created from an analogue original. Certain specifications such as resolution, color space and data format, need to be taken into account to ensure optimal text recognition later on. In many cases, your documents will already be digitised, but if not, there are a few things to keep in mind.
1.1. Resolution
In digital pictures, everything starts with tiny dots called pixels. The amount of detail in a picture depends on how many of these pixels there are. You can measure this by counting how many pixels make up the length and width of the image. You can then work out how rich and detailed the picture is by looking at how many of these little dots are packed into it. In a nutshell, this means: The more pixels you have, the better the resolution of your image. This pixel count gives you an idea of all the small, detailed parts that make up the whole picture. Resolution is measured in dpi, or dots per inch. Your images for ATR should best have 300 to 400 dpi for an A4 page.
1.2. Color Space
In general, you can do automatic text recognition regardless of the color space of your images. However, the results will be better with color images compared to black and white or grayscale images. In the past, scanning documents in bitonal (black and white) was a popular way to save memory space on the computer. Nowadays, memory isn’t as much of an issue, so we can focus on other aspects.
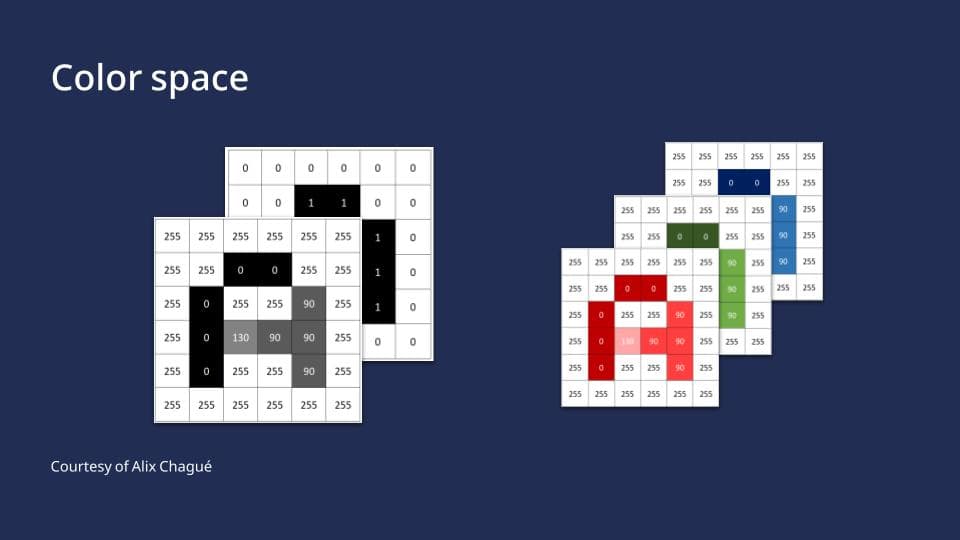
Color Space, by Alix Chagué, CC-BY-SA 2.0
If you are scanning images yourself, make sure you are scanning in color. It is the most effective way of recognizing things in pictures, such as stamps or strange bleed-through effects, but also the script itself is much more clearer in color than bitonal. Color can also help to make things clearer – boosting contrasts or even flipping colors around can make details stand out. As a rule of thumb, what the human eye can read easier, AI will also read more effectively. Nonetheless, it is important to consider the environmental impact of our calculations. Processing data with lower dimensionality results in reduced energy consumption.
1.3. File Format
For long-term archiving, formats such as TIFF or JPEG2000 are often recommended or even required by research funders. They are very rich and large file formats. However, for processing image files with ATR, though, formats such as JPG, PNG, or PDF work just fine. If you need to change an image format into another, you can use converters. We recommend ImageMagick, which is open source and free of charge.
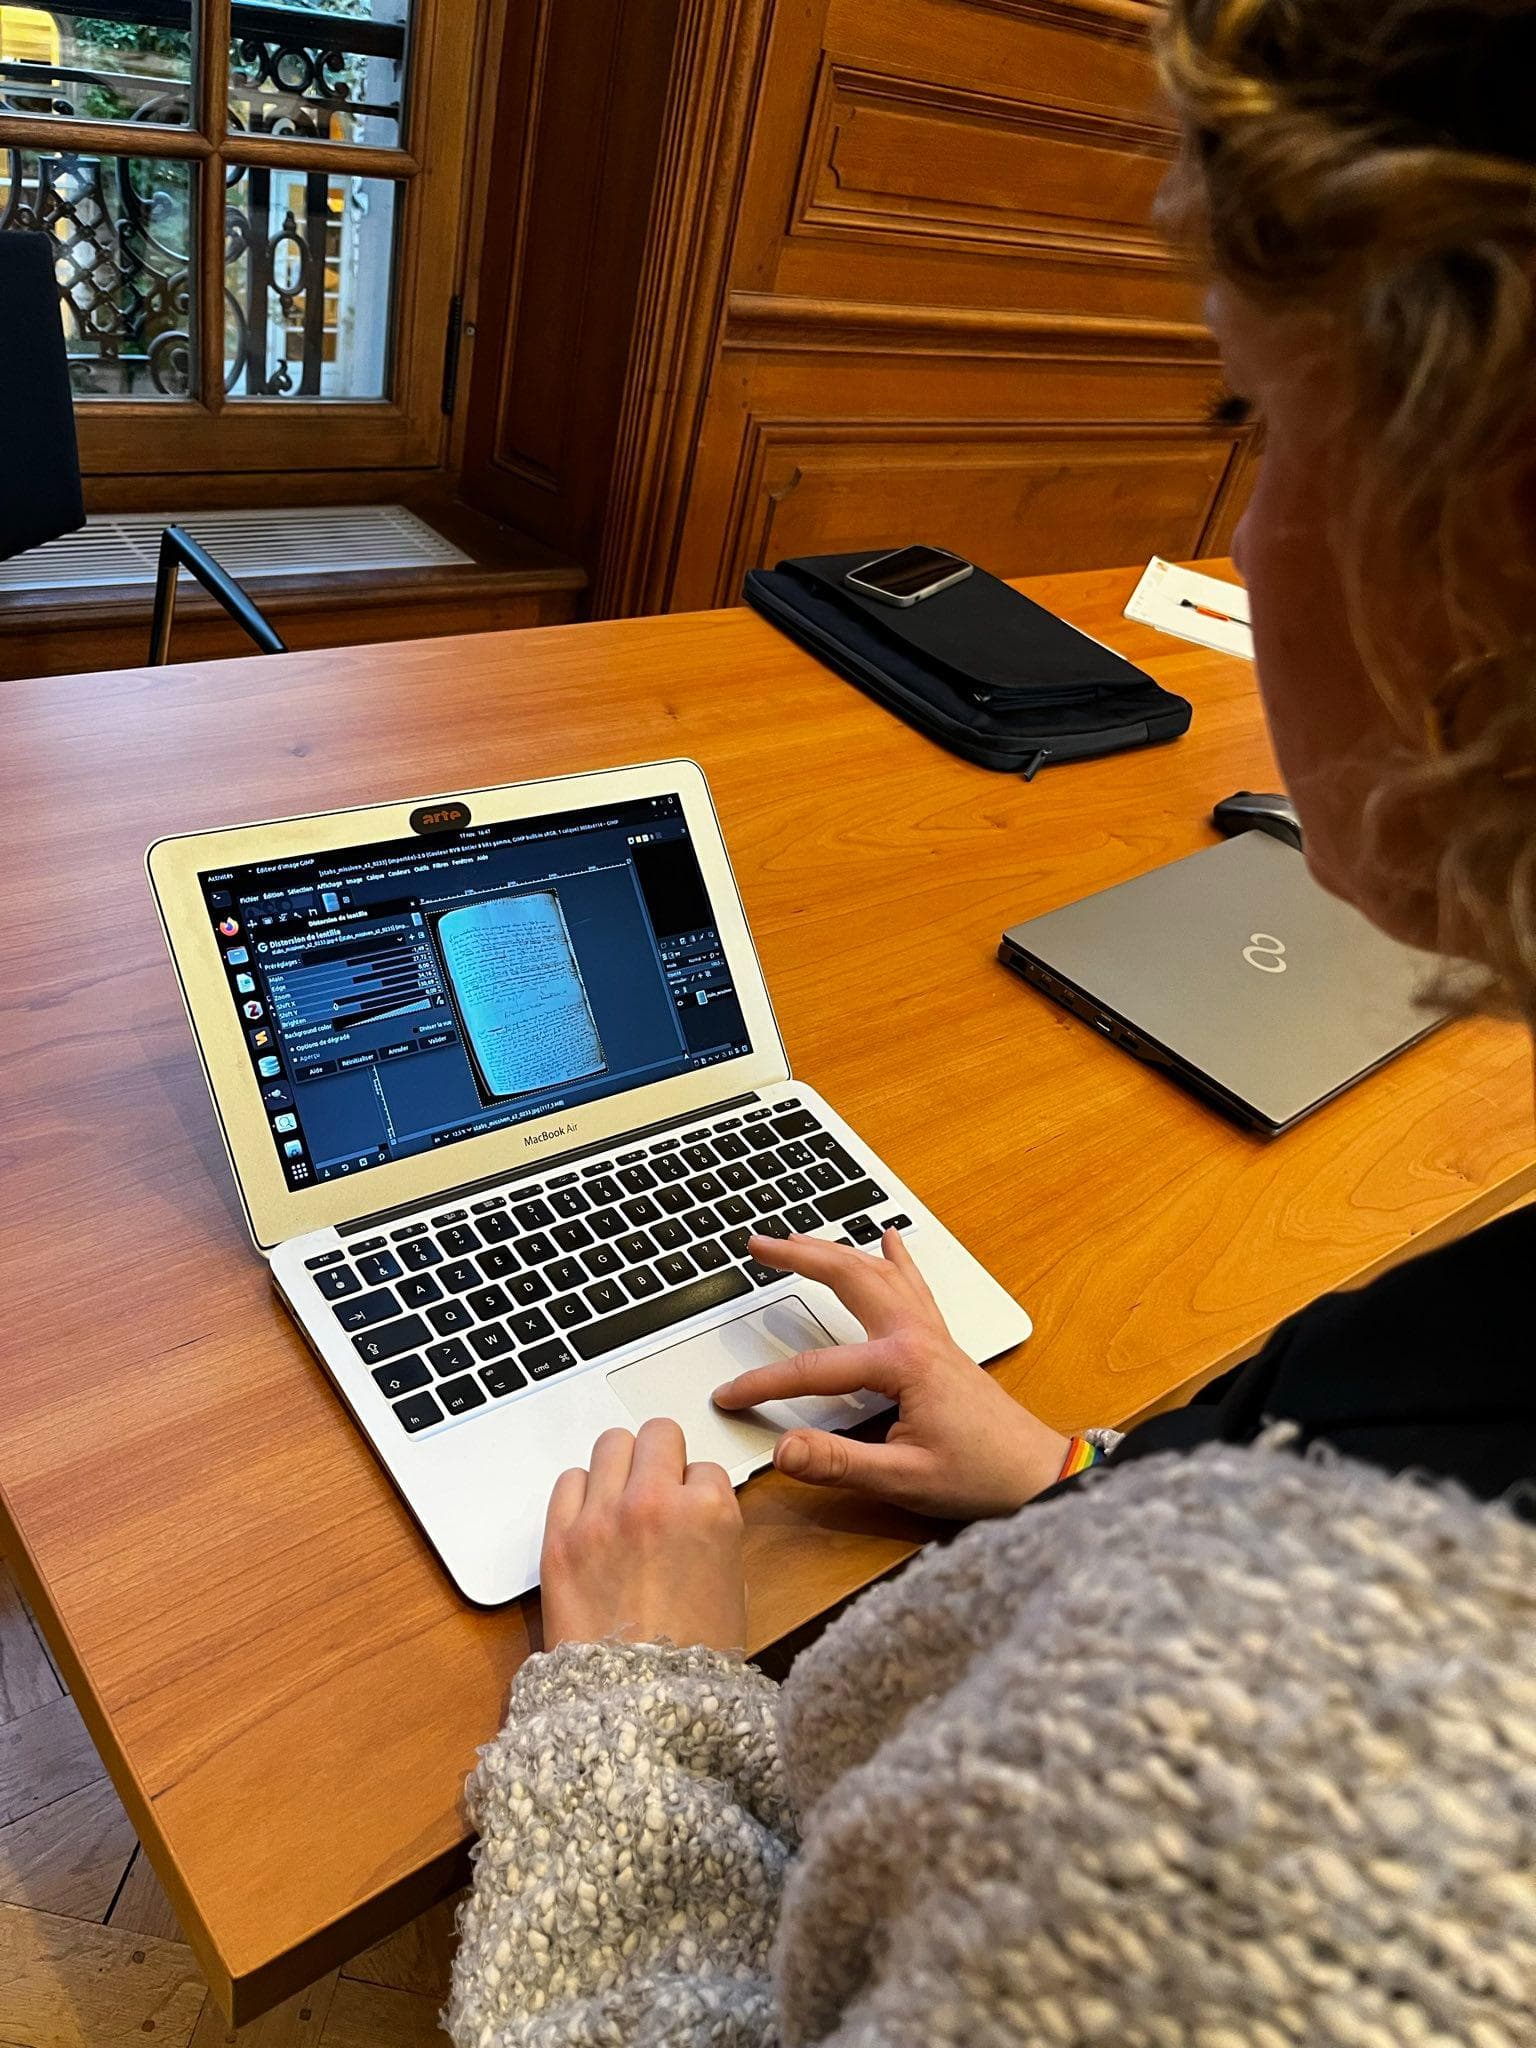
Image pre-processing – it’s not that difficult! Larissa Will optimizing her images. Hippolyte Souvay, CC-BY 4.0
2. Image input pre-processing
At this point we would like to emphasise that pre-processing is optional and in some cases not necessary at all. If you are lucky, you can start ATR straight away. This is usually the case if you receive your images from a cultural heritage institution. However, if you are faced with double-sided copies or crooked and poorly cropped images, you will have to go through what is called pre-processing. This can include according to needs adjusting brightness and contrast, cropping, splitting, rotating and dewarping. These steps are not always necessary and there is no right order, it depends on your document. Think of them as layers, to be applied as needed, in the required order
2.1. Cropping and Page Separation
Cropping a messy image is very important in order to save time later on. You can use any graphic editor to crop. For our example, we will use GIMP, which is free and very easy to use. Select the crop tool and left-click on one corner of the image. Drag the cropping area to the opposite corner in order to crop the desired area. Press Enter. To separate pages, simply repeat this twice and save each separately.
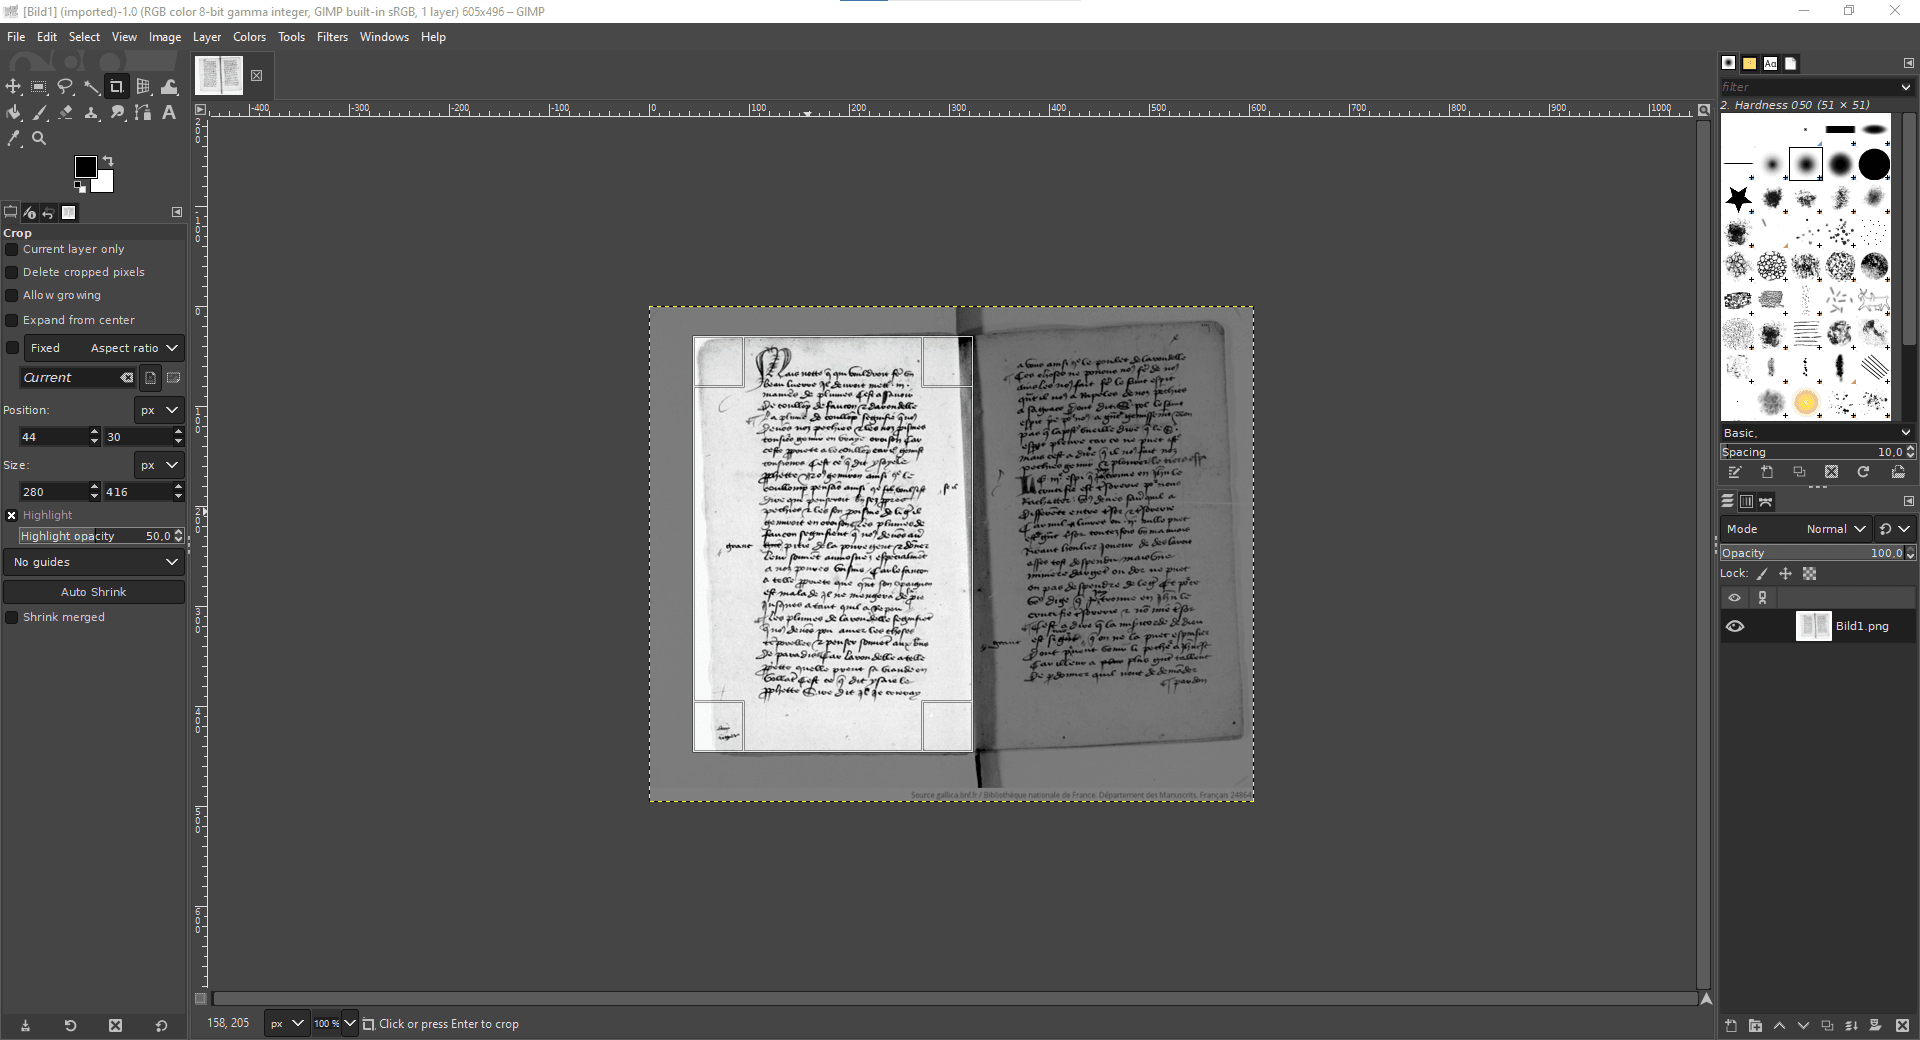
Crop and split with GIMP, Hippolyte Souvay, CC-BY-SA 2.0. Manuscript shown: Bibliothèque nationale de France. Département des Manuscrits, Français 30786 (Carrés de d’Hozier 557).
2.2. Page Rotation
You can also rotate pages using any graphic editor. We will do this by using GIMP’s rotation tool (hold down the Shift and R keys). You can then enter a value in degrees, depending on how you want to rotate your image. Press Enter. And don’t forget to save!
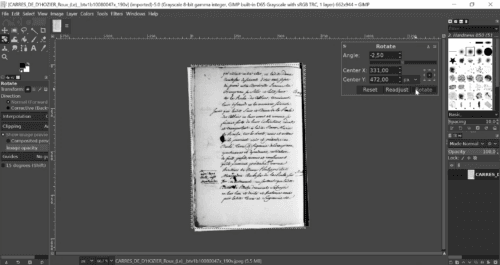
Reorienting with GIMP, Hippolyte Souvay, CC-BY-SA 2.0. Manuscript shown: Bibliothèque nationale de France. Département des Manuscrits, Français 30786 (Carrés de d’Hozier 557).
2.3. Dewarping
Dewarping or deskewing is perhaps the most technically demanding pre-processing task. You should only use it when absolutely necessary and avoid it if possible. For easy dewarping, you can also use GIMP, which has a dewarping brush (Press W). You will have to realign the lines in your document manually, which is a lot of work. You can also work with lenses. Go to Filters > Distorts > Lens Distortion and experiment with the settings to get a dewarped page. Of course there are other solutions for correcting image distortion with their own tutorials and HowTos.
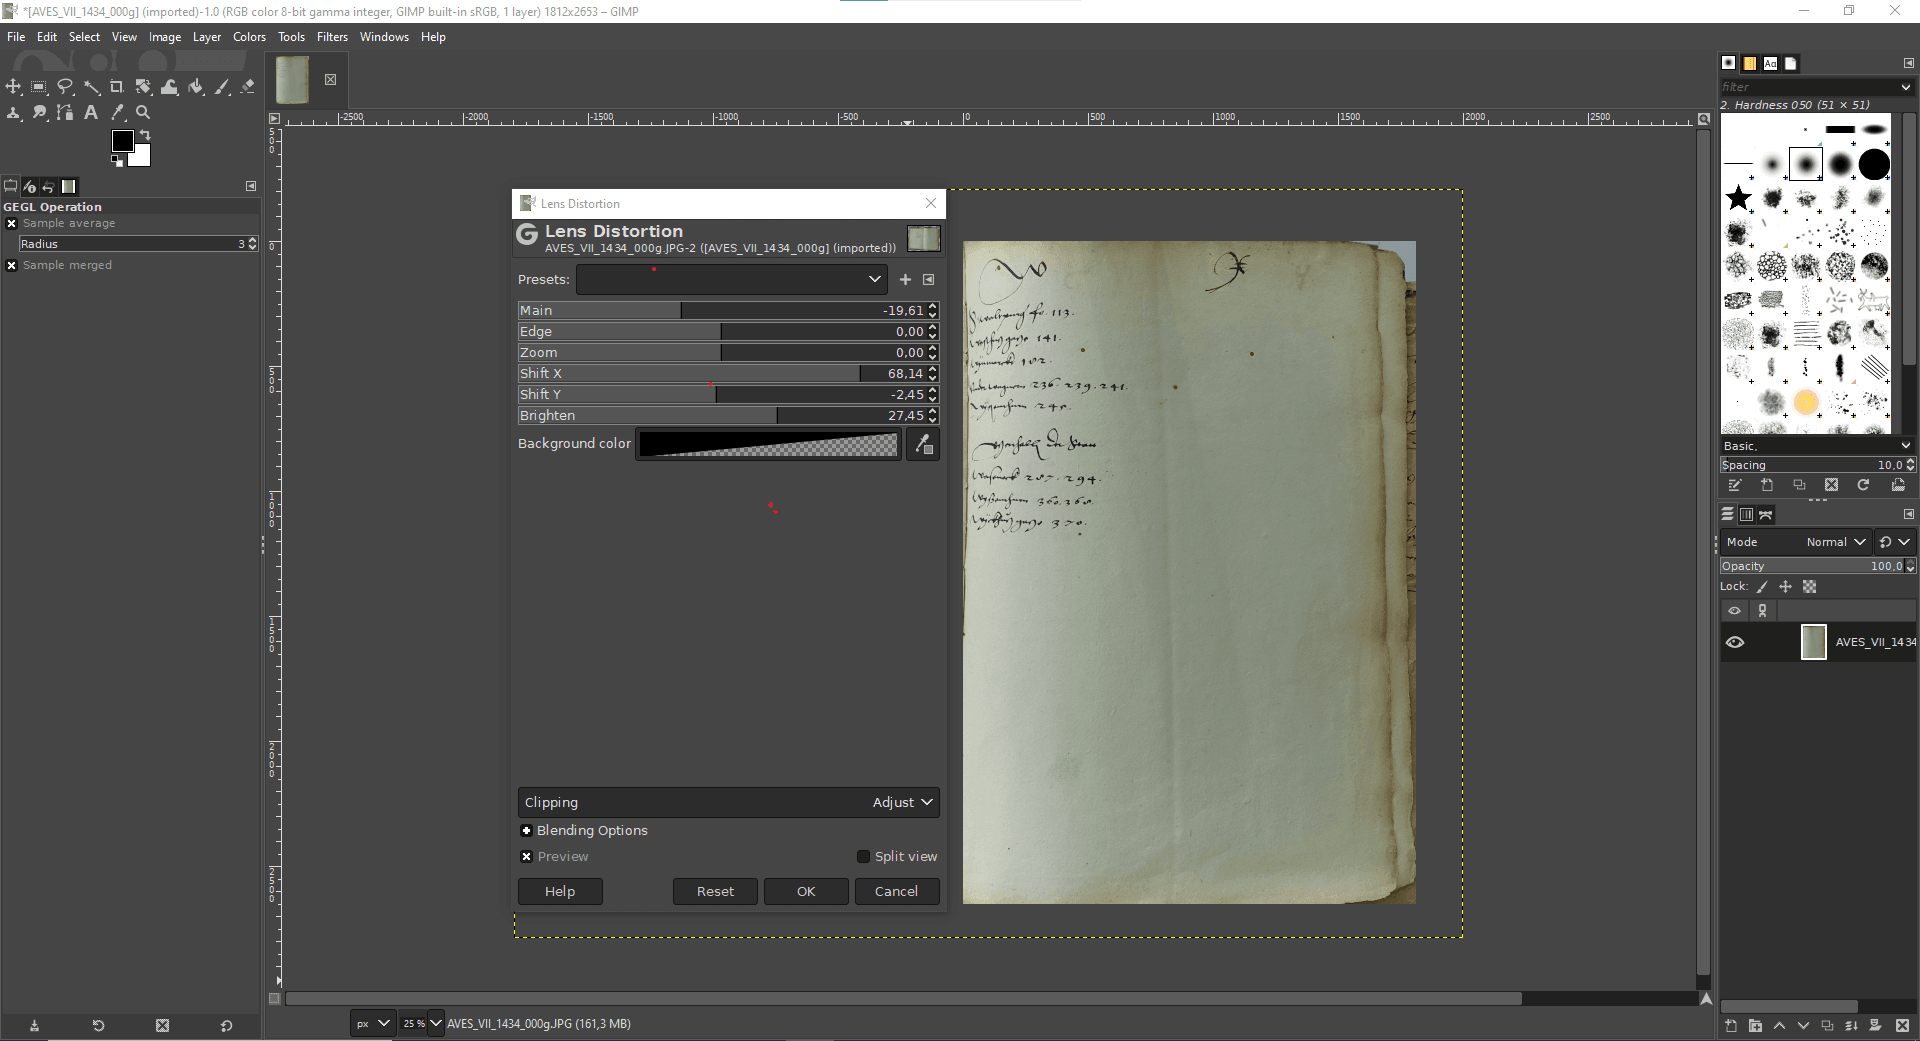
Dewarping with GIMP, Hippolyte Souvay, CC-BY-SA 2.0. Manuscript shown: Archives de la Ville et de l’Eurométropole de Strasbourg, VII 1434.
3. Pros and Cons of Pre-Processing
Starting with the pros, pre-processing can drastically reduce the amount of time you spend correcting segmentation results. It can also increase your chances of achieving better transcription results, which may ultimately be your main goal.
On the negative side, pre-processing remains largely optional and can be time consuming. Done incorrectly, pre-processing can also have a negative impact on the results. Certain imperfections in the scan (e.g., low contrasts, translucent pages) can also be learned by the layout or text recognition model. Sometimes training is more effective than pre-processing, which can make it easier to work with a large data set.
Conclusion
Ultimately, it comes down to assessing your goals and your means. What quality of results do you require and how much time can you afford to spend on pre-processing? Do you need a perfect transcription for a digital edition or is an approximate text sufficient? It is time consuming, but it might help you save time later on. Especially at the beginning it is a difficult guess.
If you cannot avoid pre-processing, test the results on a small data set before performing large-scale pre-processing. If you are scanning yourself, follow our instructions to save yourself the trouble of pre-processing. Our advice is to talk to experts and ask for their opinion. You can get help from the OCR Competence Centre of the University Libraries Tübingen and Mannheim, for example.
The “Automatic Text Recognition Made Easy” curriculum
This module is part of a wider ‘Automatic Text Recognition Made Easy’ Curriculum. You may also wish to visit the next module in this curriculum, Automatic Text Recognition (ATR) - Layout Analysis.