
Creating a New Branch
In all cases when adding a new resource, or adding a new person, you want to create a new ‘branch’. To do this, first go to the dashboard.
On the main window, you will see the branch you are currently on indicated in the box above all the buttons for resource types. This is usually the ‘main’ branch. Check to make sure you are already on the ‘main’ branch first, and then click on the ‘New Branch’ button underneath. A pop-up window will appear. Fill this in with the name of the branch you want to work on.
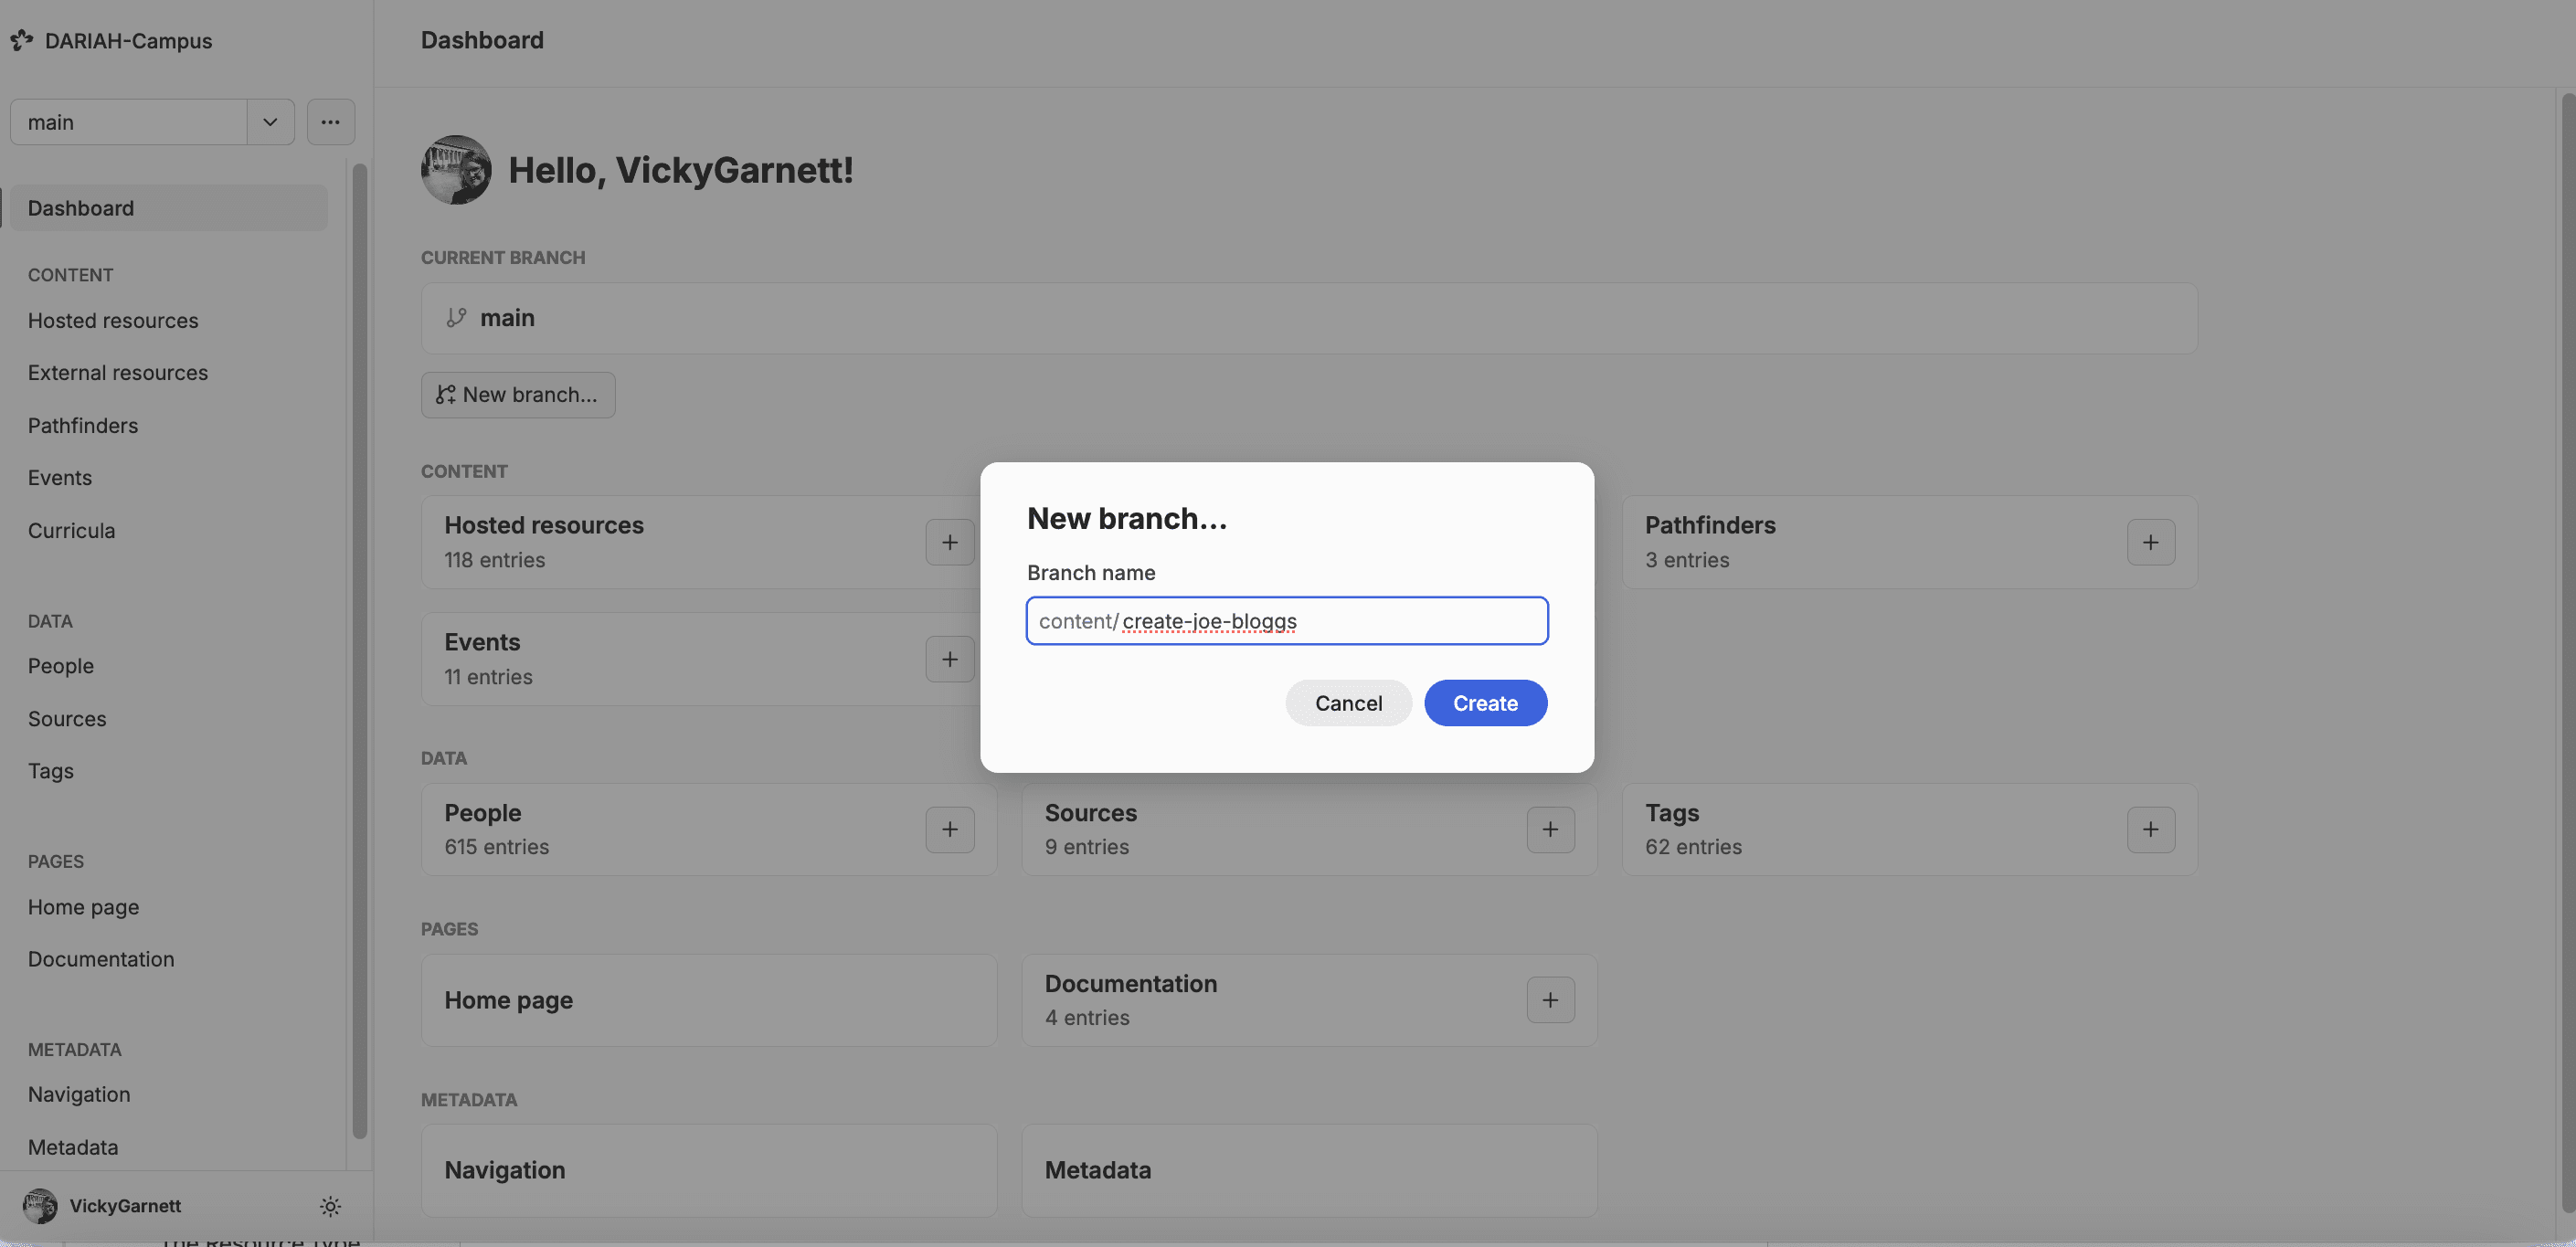
Once you have hit the ‘create’ button, you will notice that there is now a new button underneath the ‘current branch’ window on the dashboard, as shown in (1) on the image below.
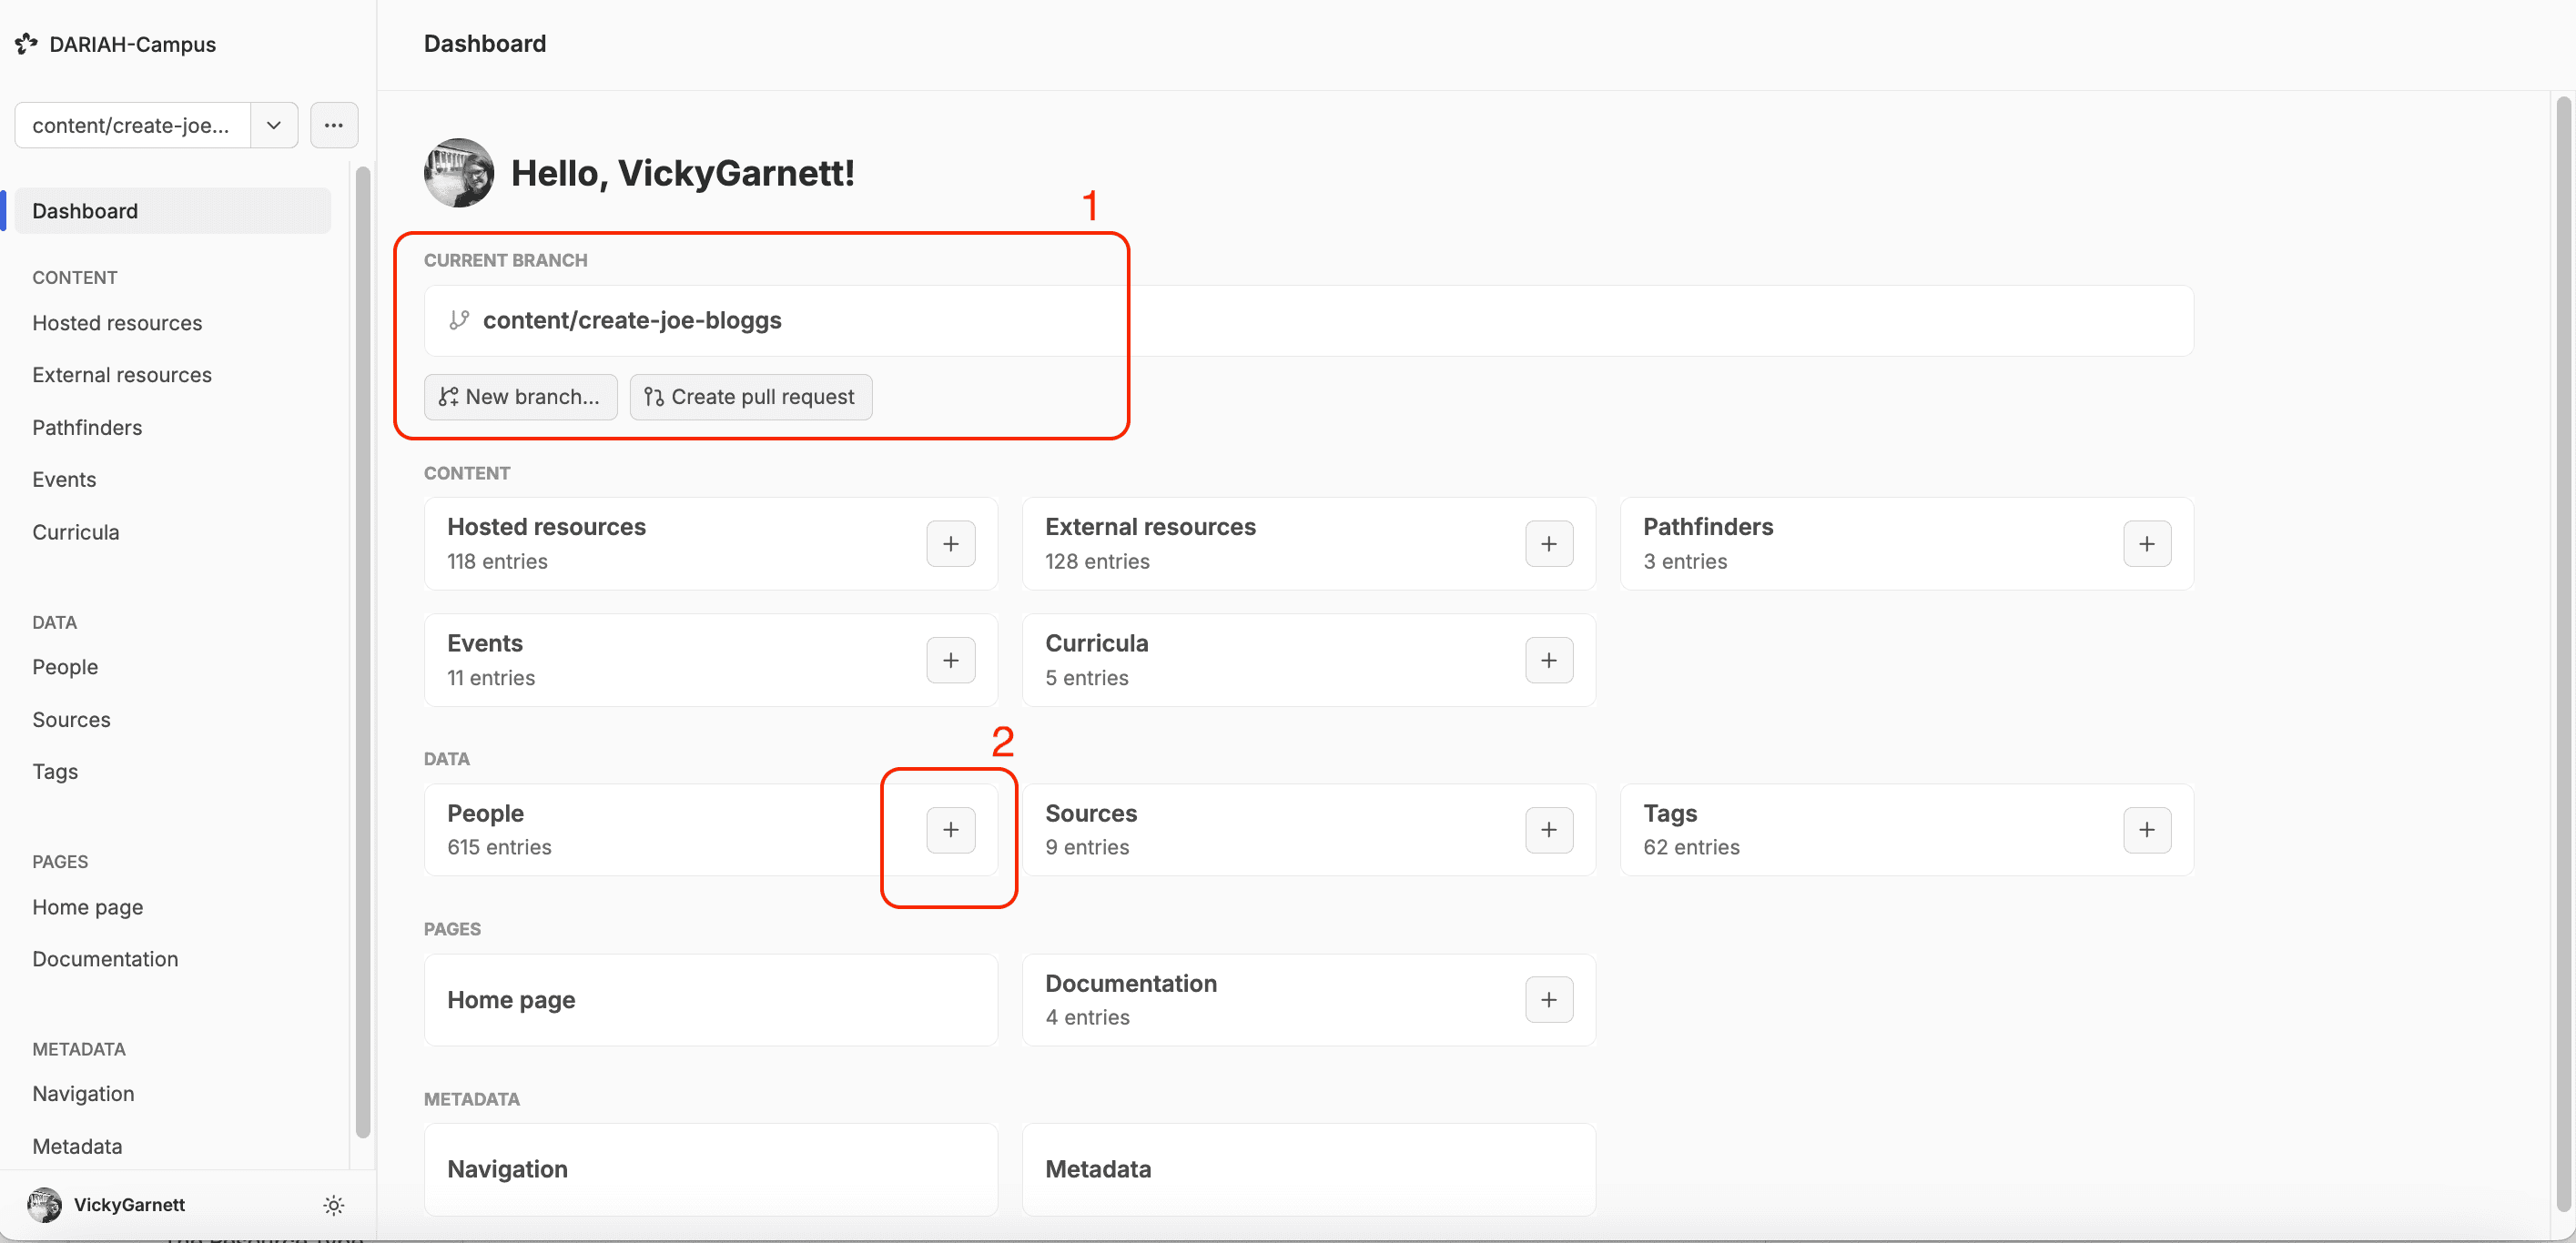
The branch you have created will then be accessible from the branch drop down menu on the left-hand navigation panel whenever you go into the CMS. You should make sure that you save any changes you make to this branch as you make edits. Once the edits you have made have been published onto the ‘main’ branch in DARIAH-Campus, your own branch will be deleted. If you want to make future changes to your resource after that, you will have to create a new branch using this same method.