
Creating and Editing New People
Now that you are familiar with what the different buttons on the Dashboard do, you can start to draft up and edit content. For the most part this will be creating new learning resources, but it is also possible that you will have to create or edit a ‘person’ profile. For reasons that will become apparent as we move through this guide, it is best to either make sure that all the people you want to list as authors, contributing authors and/or editors for your resource are already in the system, or to add them in your ‘New Resource Branch’ first before you make a start on the content of your resource. We therefore begin with this process.
Check for Existing ‘People’ Files
Before you begin creating any new ‘Person’ profile, you need to first check that they aren’t already in the system, in order to avoid duplications. You can do this in the CMS and also on the main DARIAH-Campus website. But, as we are discussing the CMS here, we will focus on that method.
From the dashboard, select the ‘People’ option. This will bring you to the full list of data files of individual people. As there are over 600 people in the system, you will not see everyone on this screen, so you will have to go searching for them. The list is in alphabetical order by surname/family name, so you can check through the list this way. Alternatively (and more quickly!) you can use the search function above the list on the right hand side. Once you start typing, it will automatically whittle the list down to potential ‘people’.
Creating a New ‘People’ file
If you have verified that the person you want to add definitely isn’t already in the system, you can proceed to add them.
Entering Information in the ‘People’ Template
From here, you can now create a new person by clicking on the ‘add’ (’ + ’) symbol in the ‘People’ option. The main panel will now change to the edit page for creating and modifying people profiles.
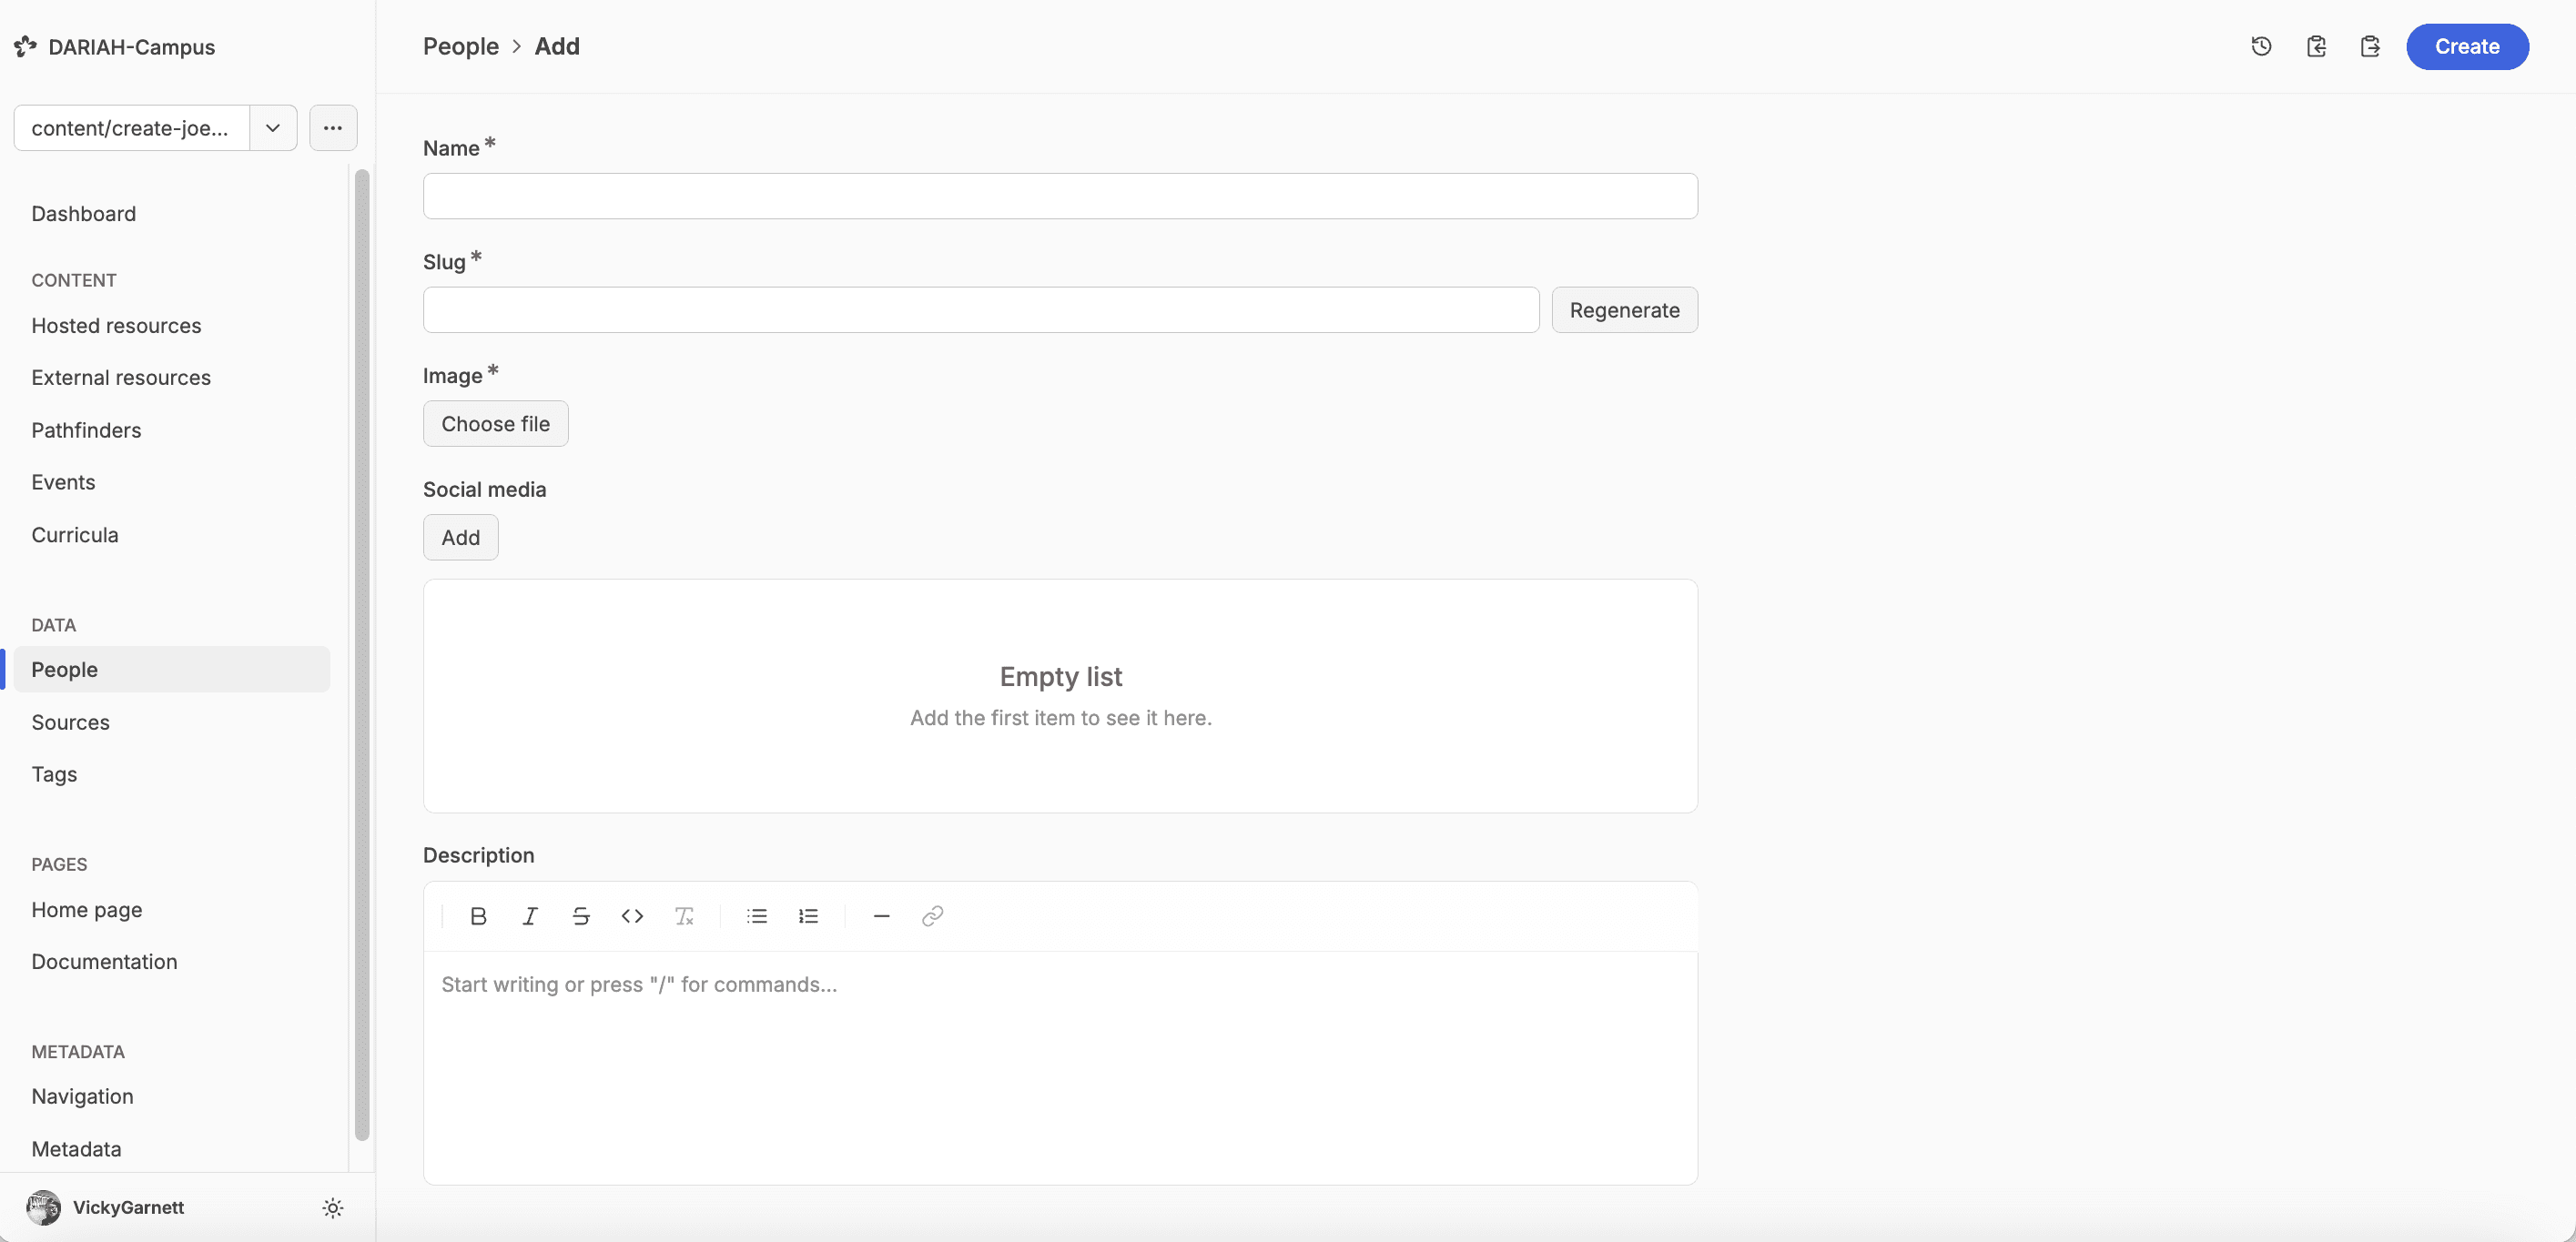
You can fill in all the details for your new person, making sure that you fill in all the fields with an asterisk as these are required information.
Note, though, that the ‘slug’ field is automatically generated based on the name of the person. You need to check that this fits the ‘lastname-firstname’ format that is used in DARIAH-Campus. If it does not, you will need to change this manually. Do not hit the ‘Regenerate’ button as this will reset the slug back to the incorrect form.
You can continue to enter information, making sure to also include an image for the person you are creating in the system, as is required. We also encourage you to add a brief biography of the person in the ‘Description’ field. This is not required, but if you intend to use them in an event, then it is good to include their biography here.
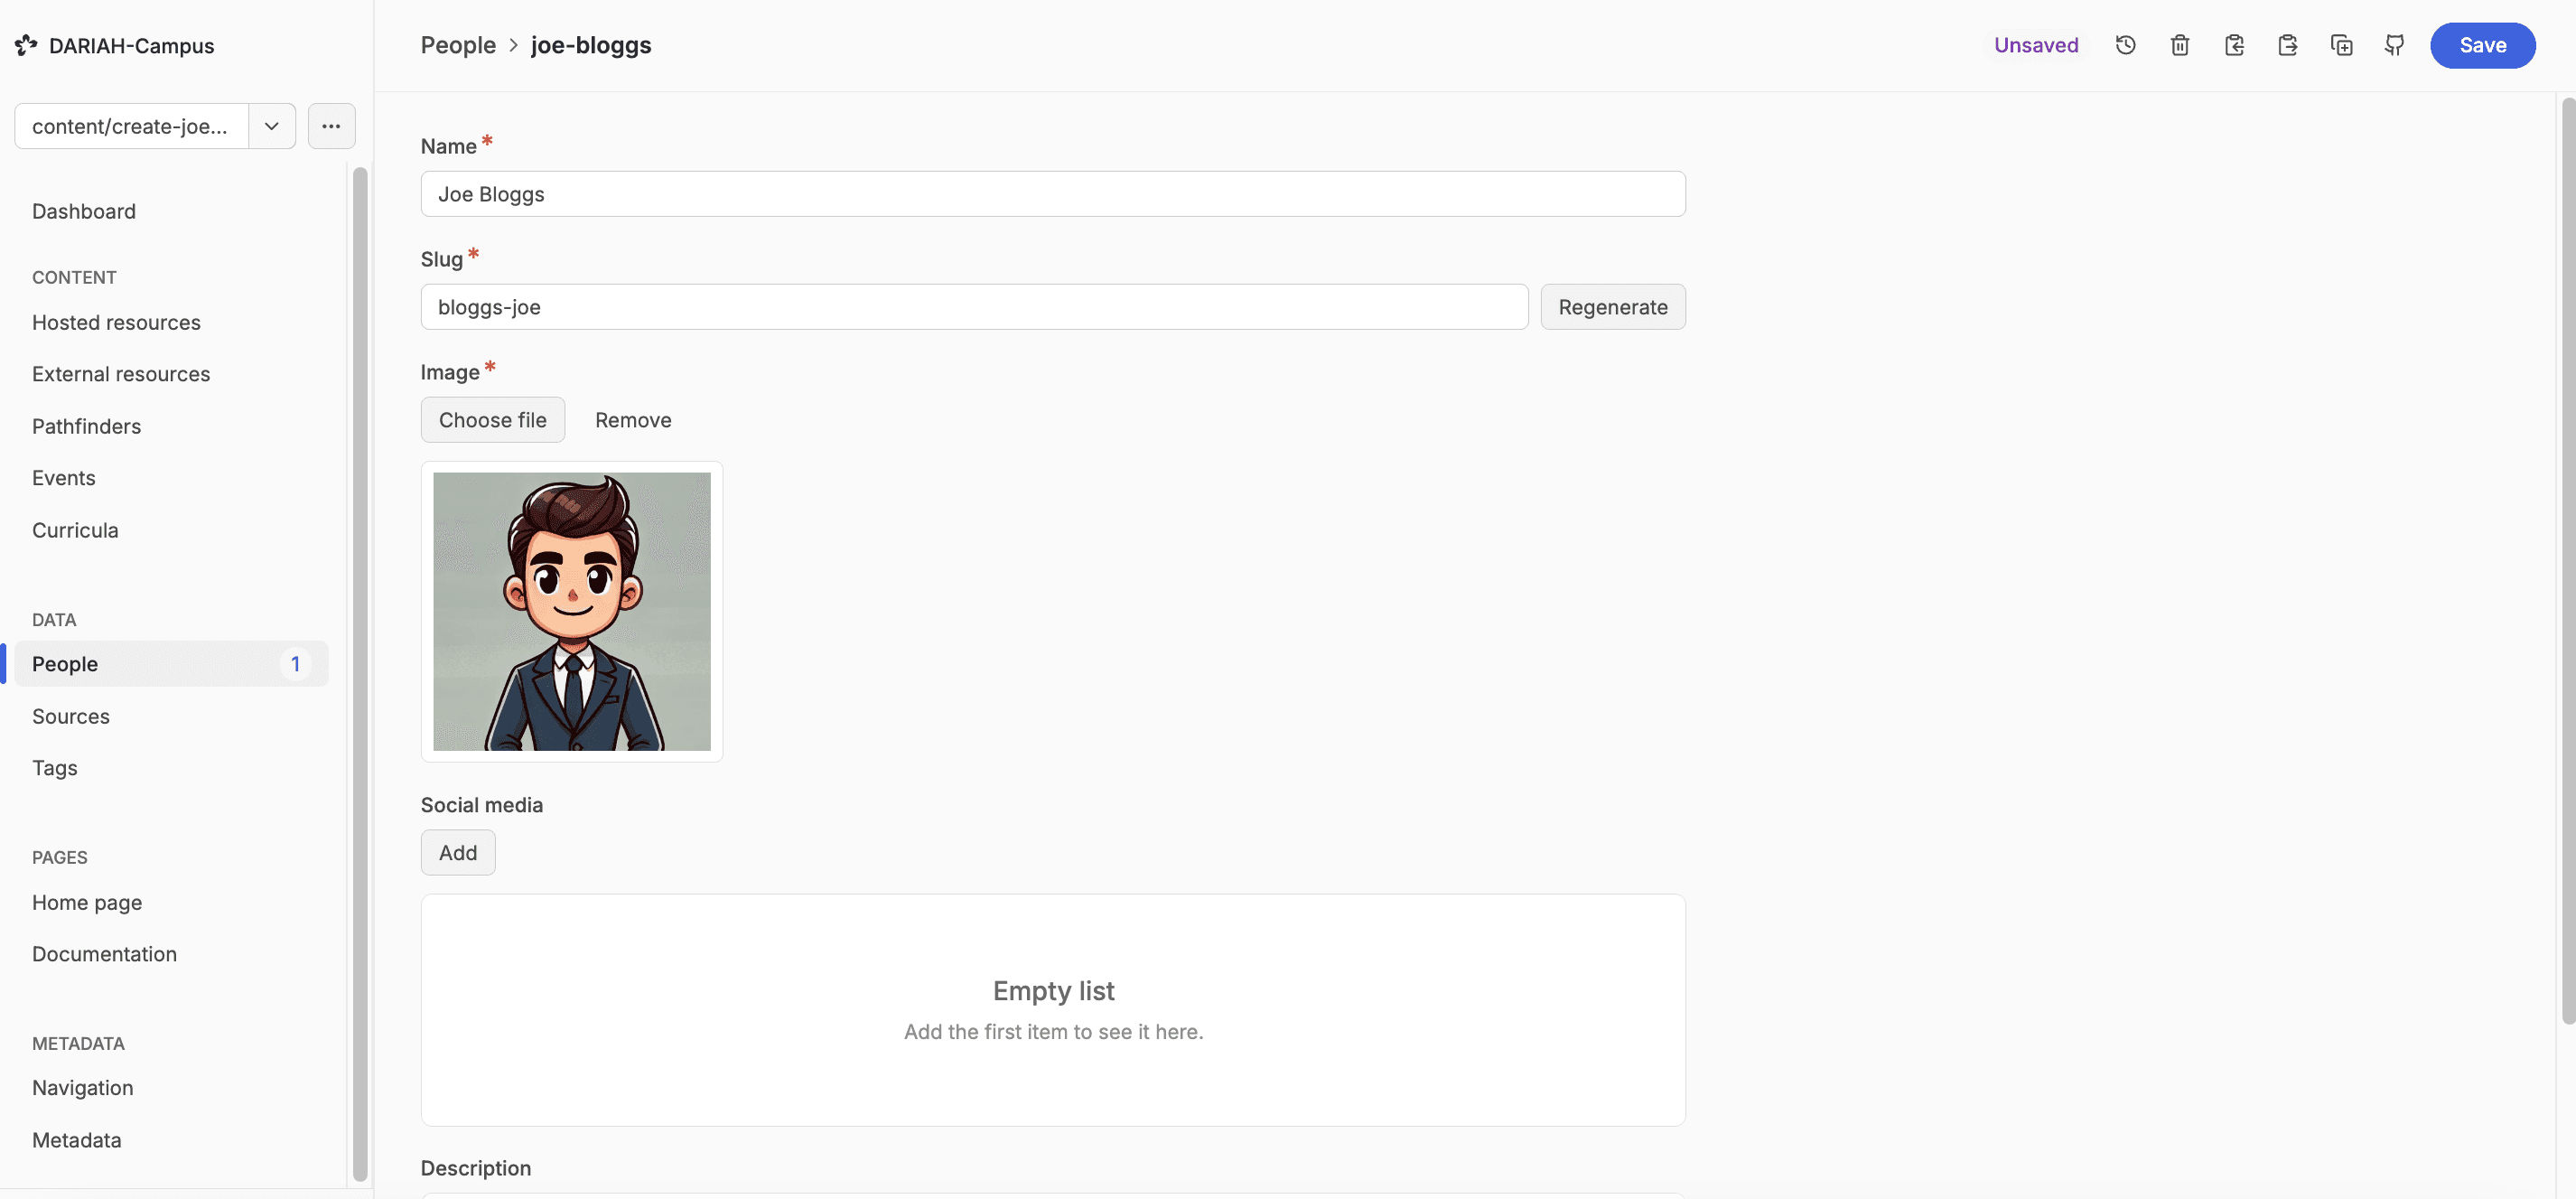
Once you have filled in the required information, and any additional information you wish to, you can hit the ‘Create’ blue button in the top right-hand corner of the screen. This generates the file. This button will change to ‘Save’ once you have done this. From here you can now make additional changes to this file before you submit it for publication.
Sending Your New ‘Person’ for Publication
When you have all the information required and you are happy with the profile, you can then move it through to the review stage for publication by creating a ‘Pull Request’. However, if you are adding new people as part of a bigger contribution, such as creating a new learning resource or a ‘Captured Event’, you do not need to publish your new person just yet. This will be done as part of the overall Pull Request that you generate for this new resource.
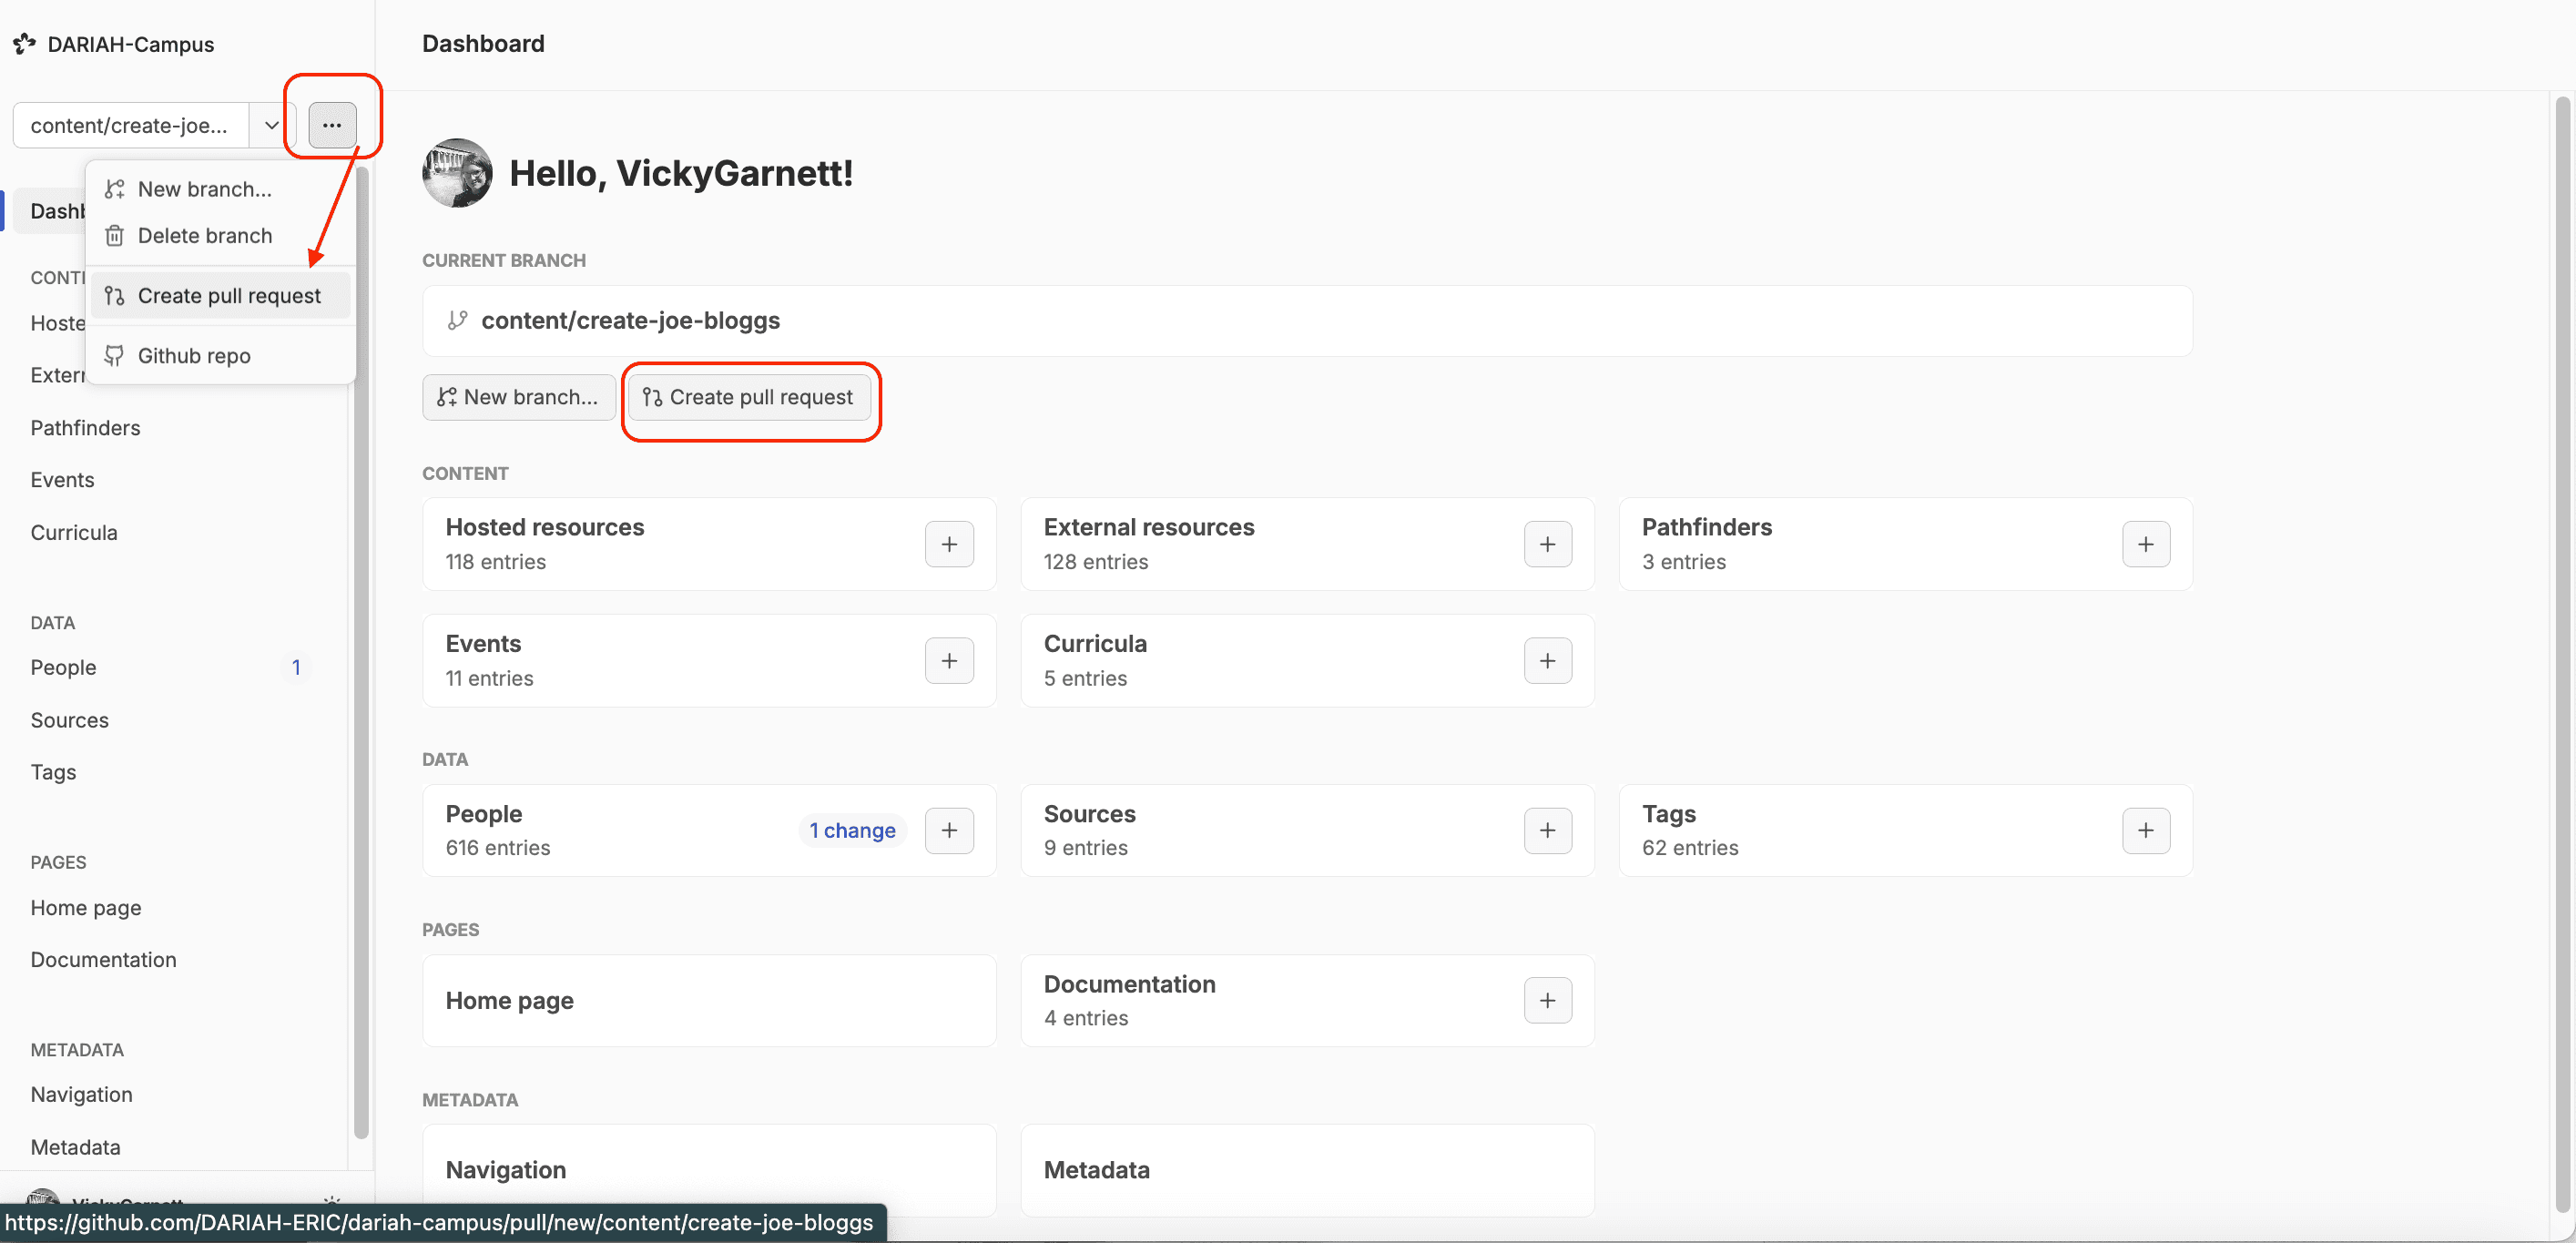
Navigate back to the ‘Dashboard’. You will now see that there is a blue notice on the ‘People’ option to indicate that a change has been made in that directory.
To create a Pull request, there are two options. You can either click on the ‘Create Pull Request’ button immediately below the ‘Current Branch’ field in the main panel. Alternatively you can also click on the three-dotted ‘Branch Option’ button at the top of the navigation panel to get a drop down menu, from where you can select ‘Create Pull Request’.
You can scroll down, as the gif below shows, to see all these changes. You will also see a green button that says ‘Create Pull Request’. Assuming you are happy that all the information in this commit is correct, you can hit that button, and a new pull request will be generated.
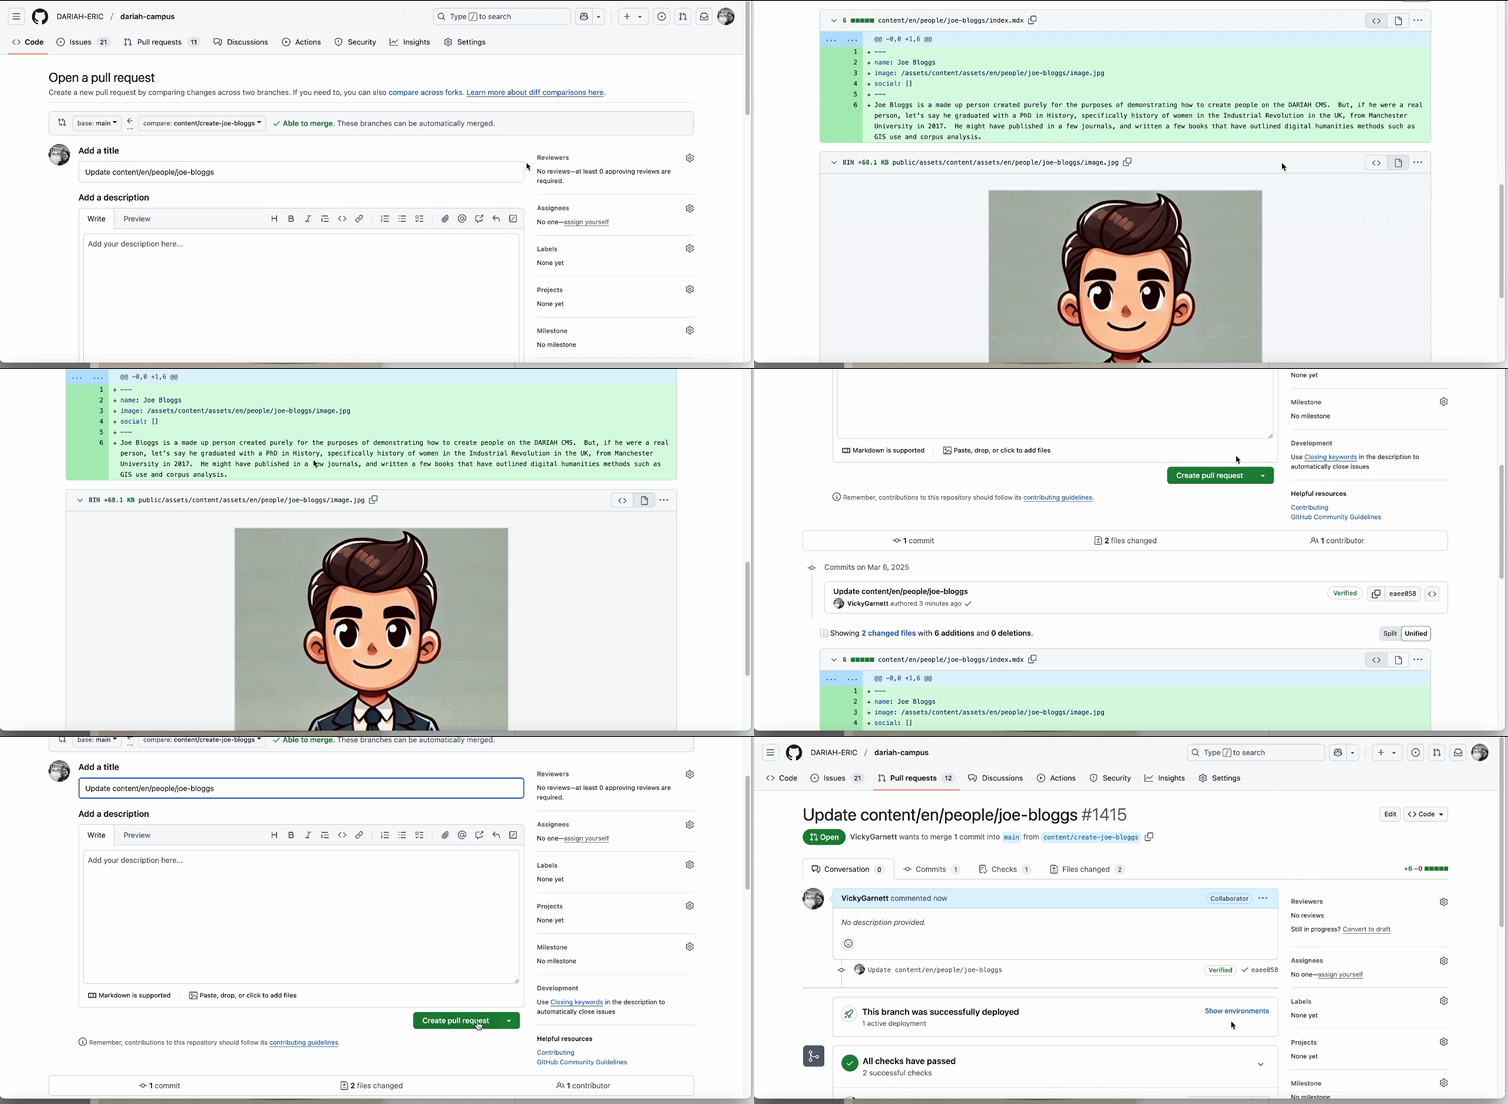
This will now enable the editorial team to look at the new Person file you have created, and publish it. They may also come back to you with questions or suggestions for changes within the ‘conversation’ page of this new pull request. Once the editorial team has published your new Person file, the branch that you used to create it will be deleted from the CMS.
But for now, your work creating a new person is done!
Editing an Existing Profile
Sometimes you might need to update a profile for a person. This might be to change the image associated with them, or to add a ‘Description’ if they are to be included as an author or speaker in a Captured Event resource.
-
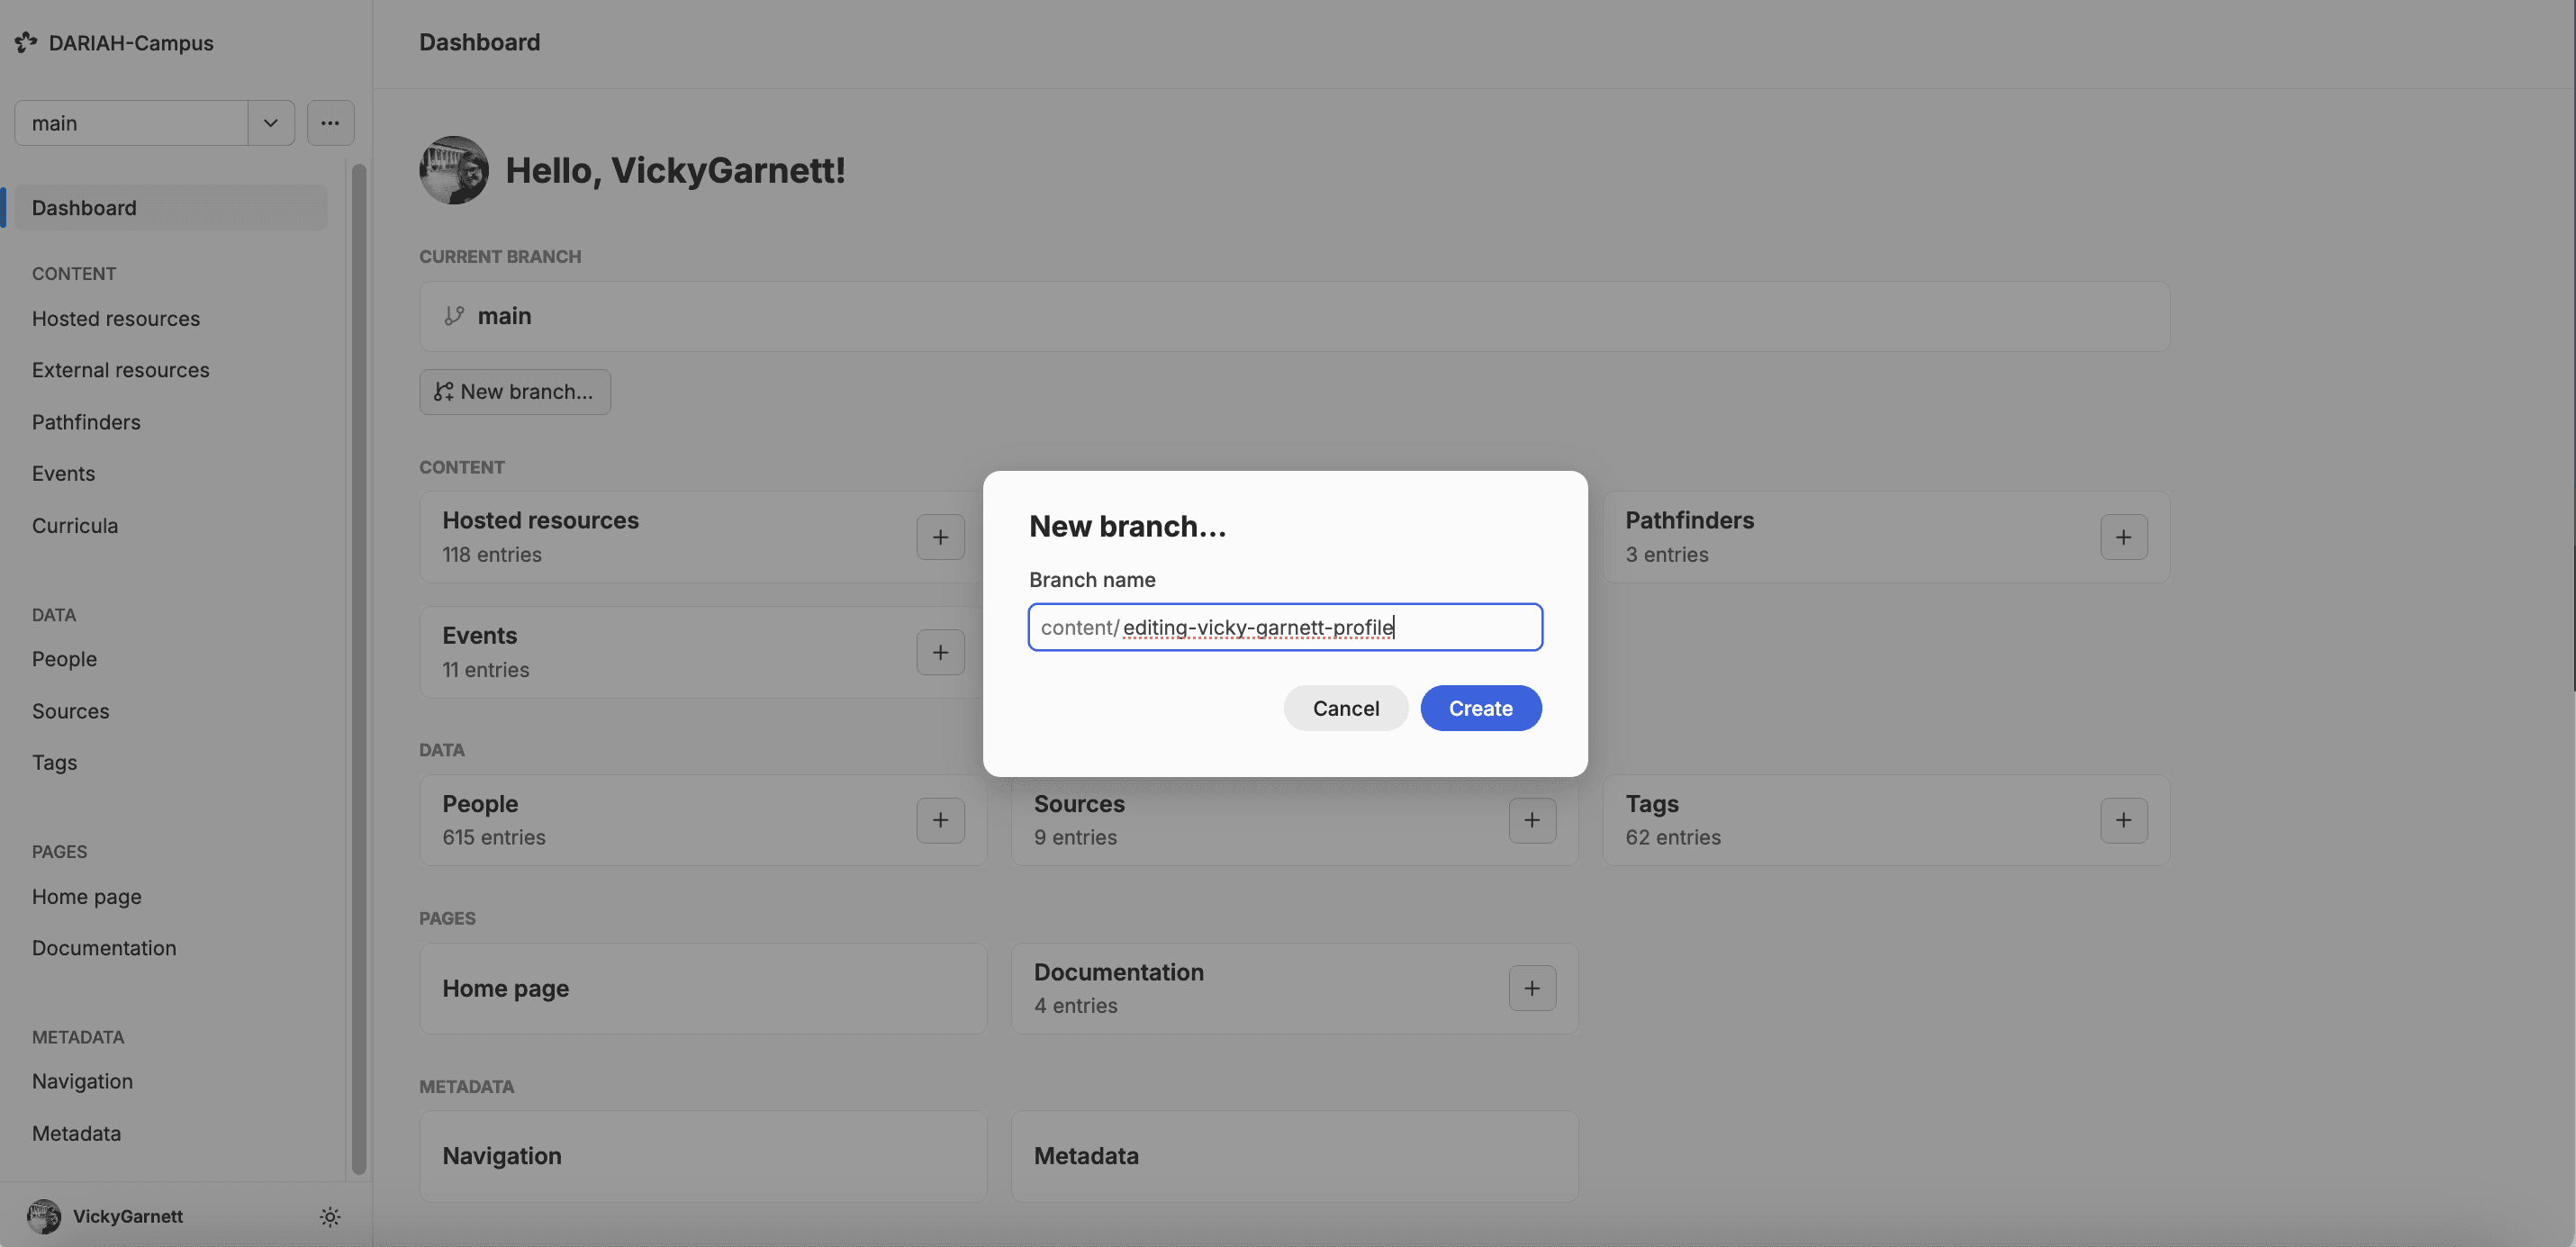
First make sure that the ‘Current Branch’ is set to ‘Main’, and create a new Branch, using the method outlined ‘Creating a New Branch’. Make sure to give your branch a meaningful name that makes sense for the changes you want to make:
-
Find the person you want to update using the method outlined in ‘Entering Information in the ‘People’ Template’ above. Click on their profile, and you will be taken to the same editing page to work on.
-
Make the changes you need to.
-
Make sure that you click on the ‘Save’ button at the top, and then follow the same procedure as given above to create a new pull request (see ‘Sending Your New ‘Person’ for Publication’).