
Creating / Editing an External Resource
In the new content management system, all resource types have their own templates and different requirements in terms of information and metadata. Therefore it is important that you select the correct resource type template that you want to create. If you are looking to edit an existing external resource, you will find all the published external resources filed accordingly in the CMS, and listed alphabetically.
As with all changes to DARIAH-Campus, you must first create a branch. Make sure that you are on the ‘Main’ branch when you create a new branch to make sure that you are working on the most up-to-date version.
Once you have created your new branch, you can now click on the ’+’ symbol in the ‘External resources’ category button if you are creating a new resource. This will create a new working space in which to fill in the template for this resource type. If you want to edit an existing external resource, you can search for it in the list of external resources, and click into it from there. We will continue as if creating a new resource, but the principles for editing existing resources are the same.
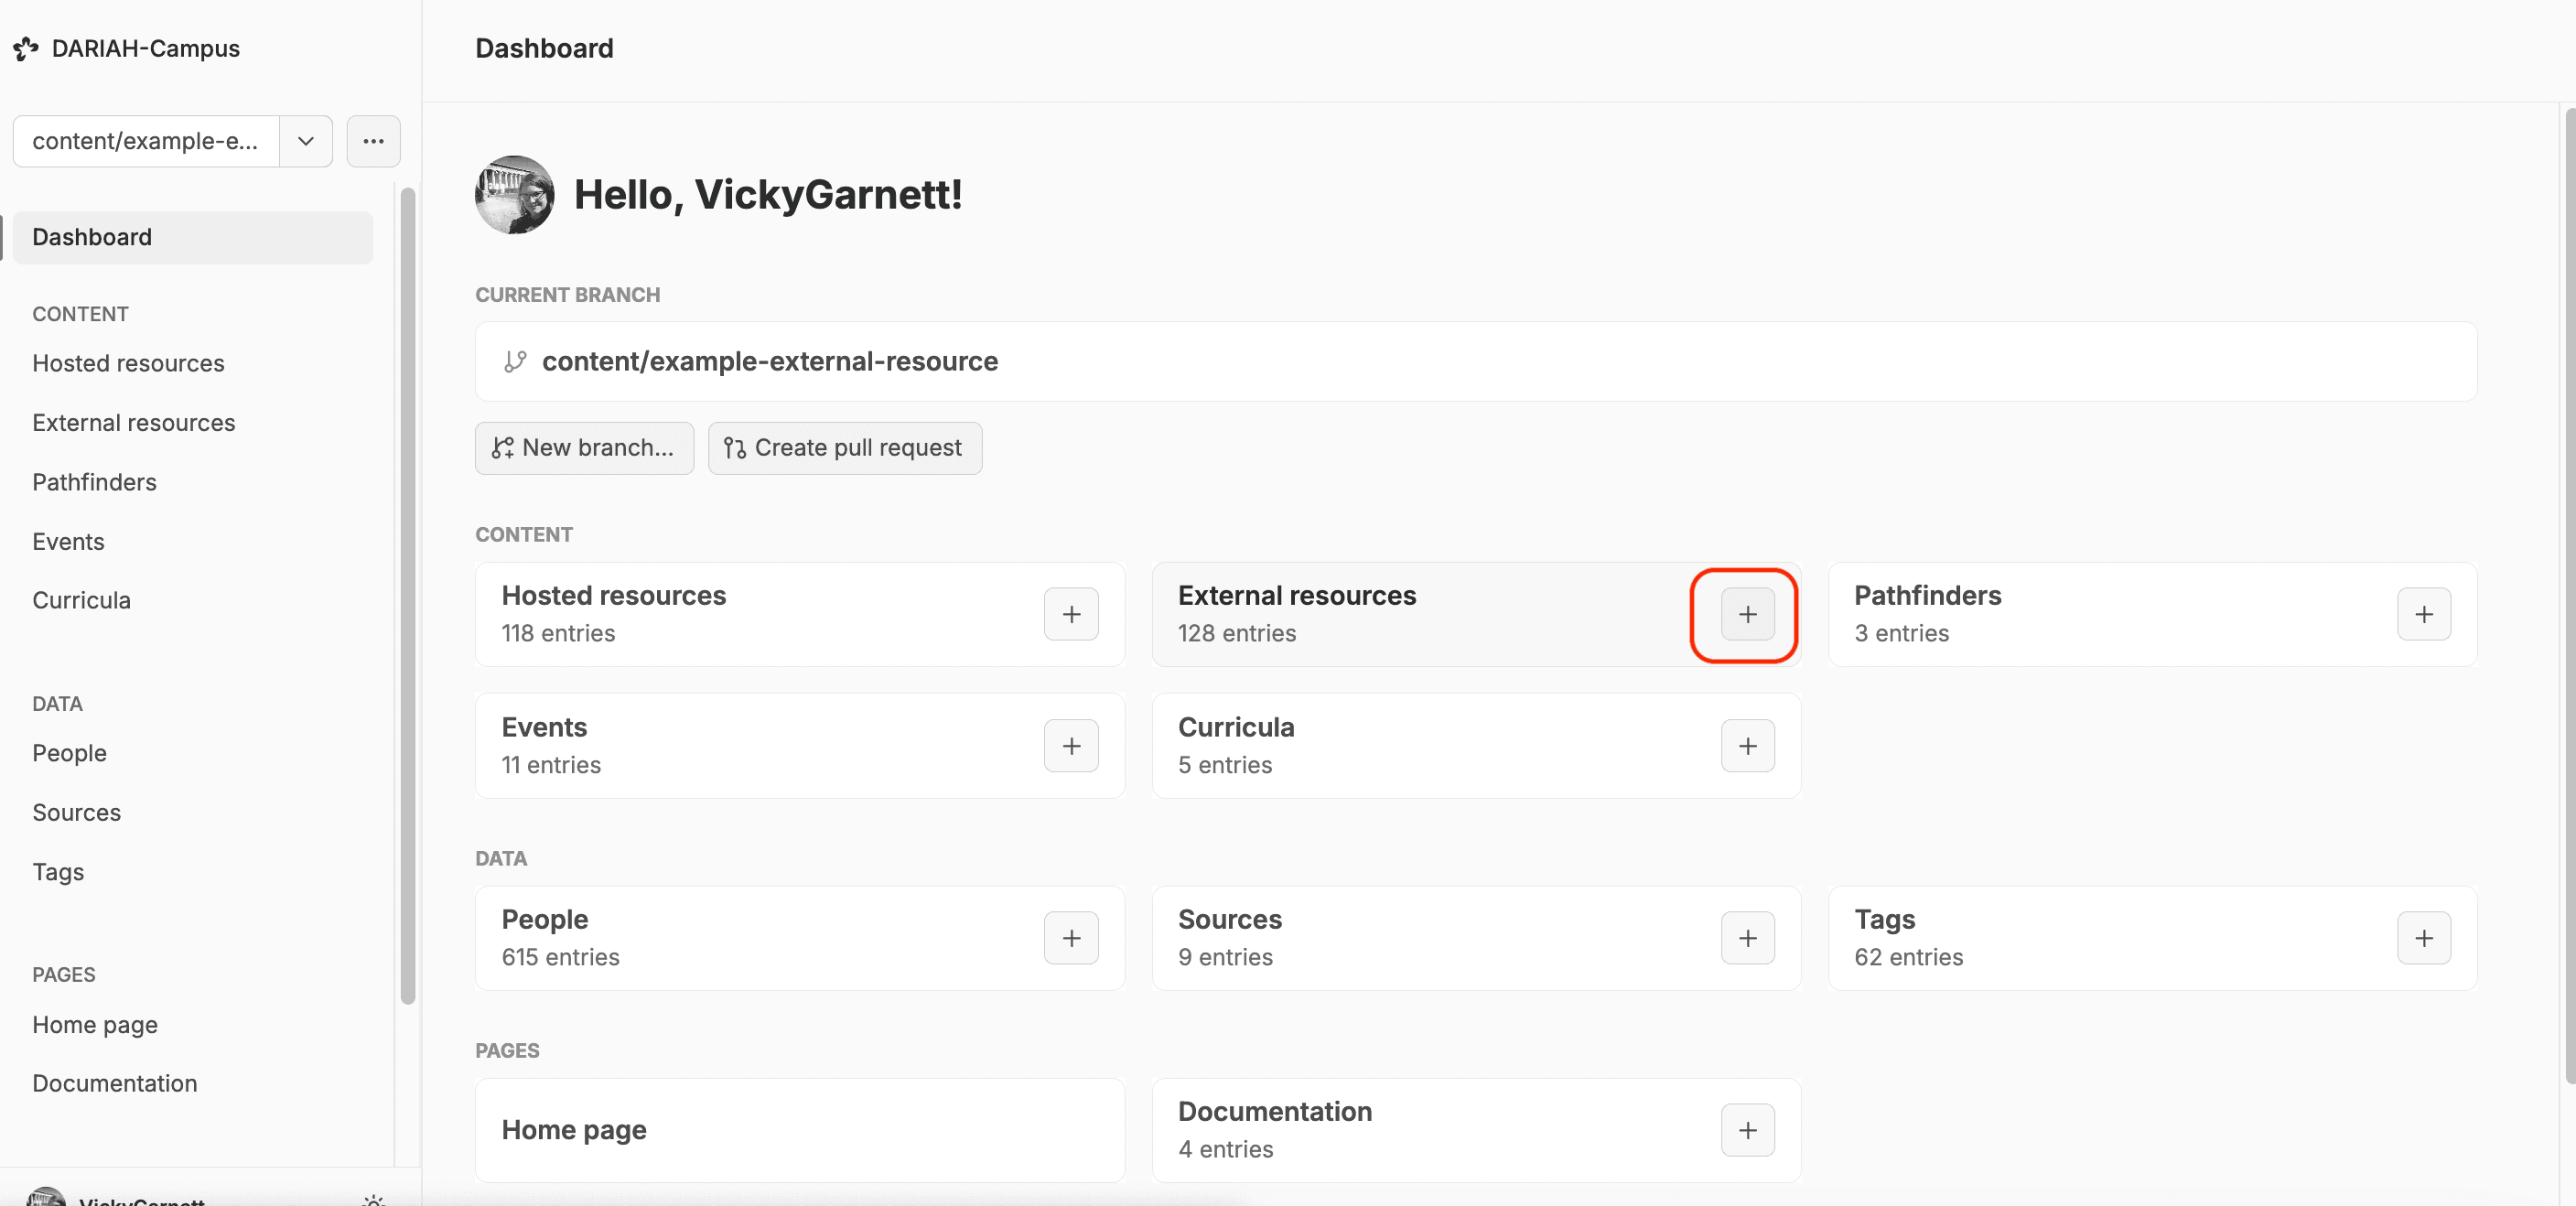
The workspace for an external resource has two main parts. In the middle (1) is the workspace for the more free-hand creative part of the resource, where you will write the description and add the other ‘External Resource’ widgets. But for now the first part to complete is the metadata template (2) which indicates which fields are required with an asterisk.
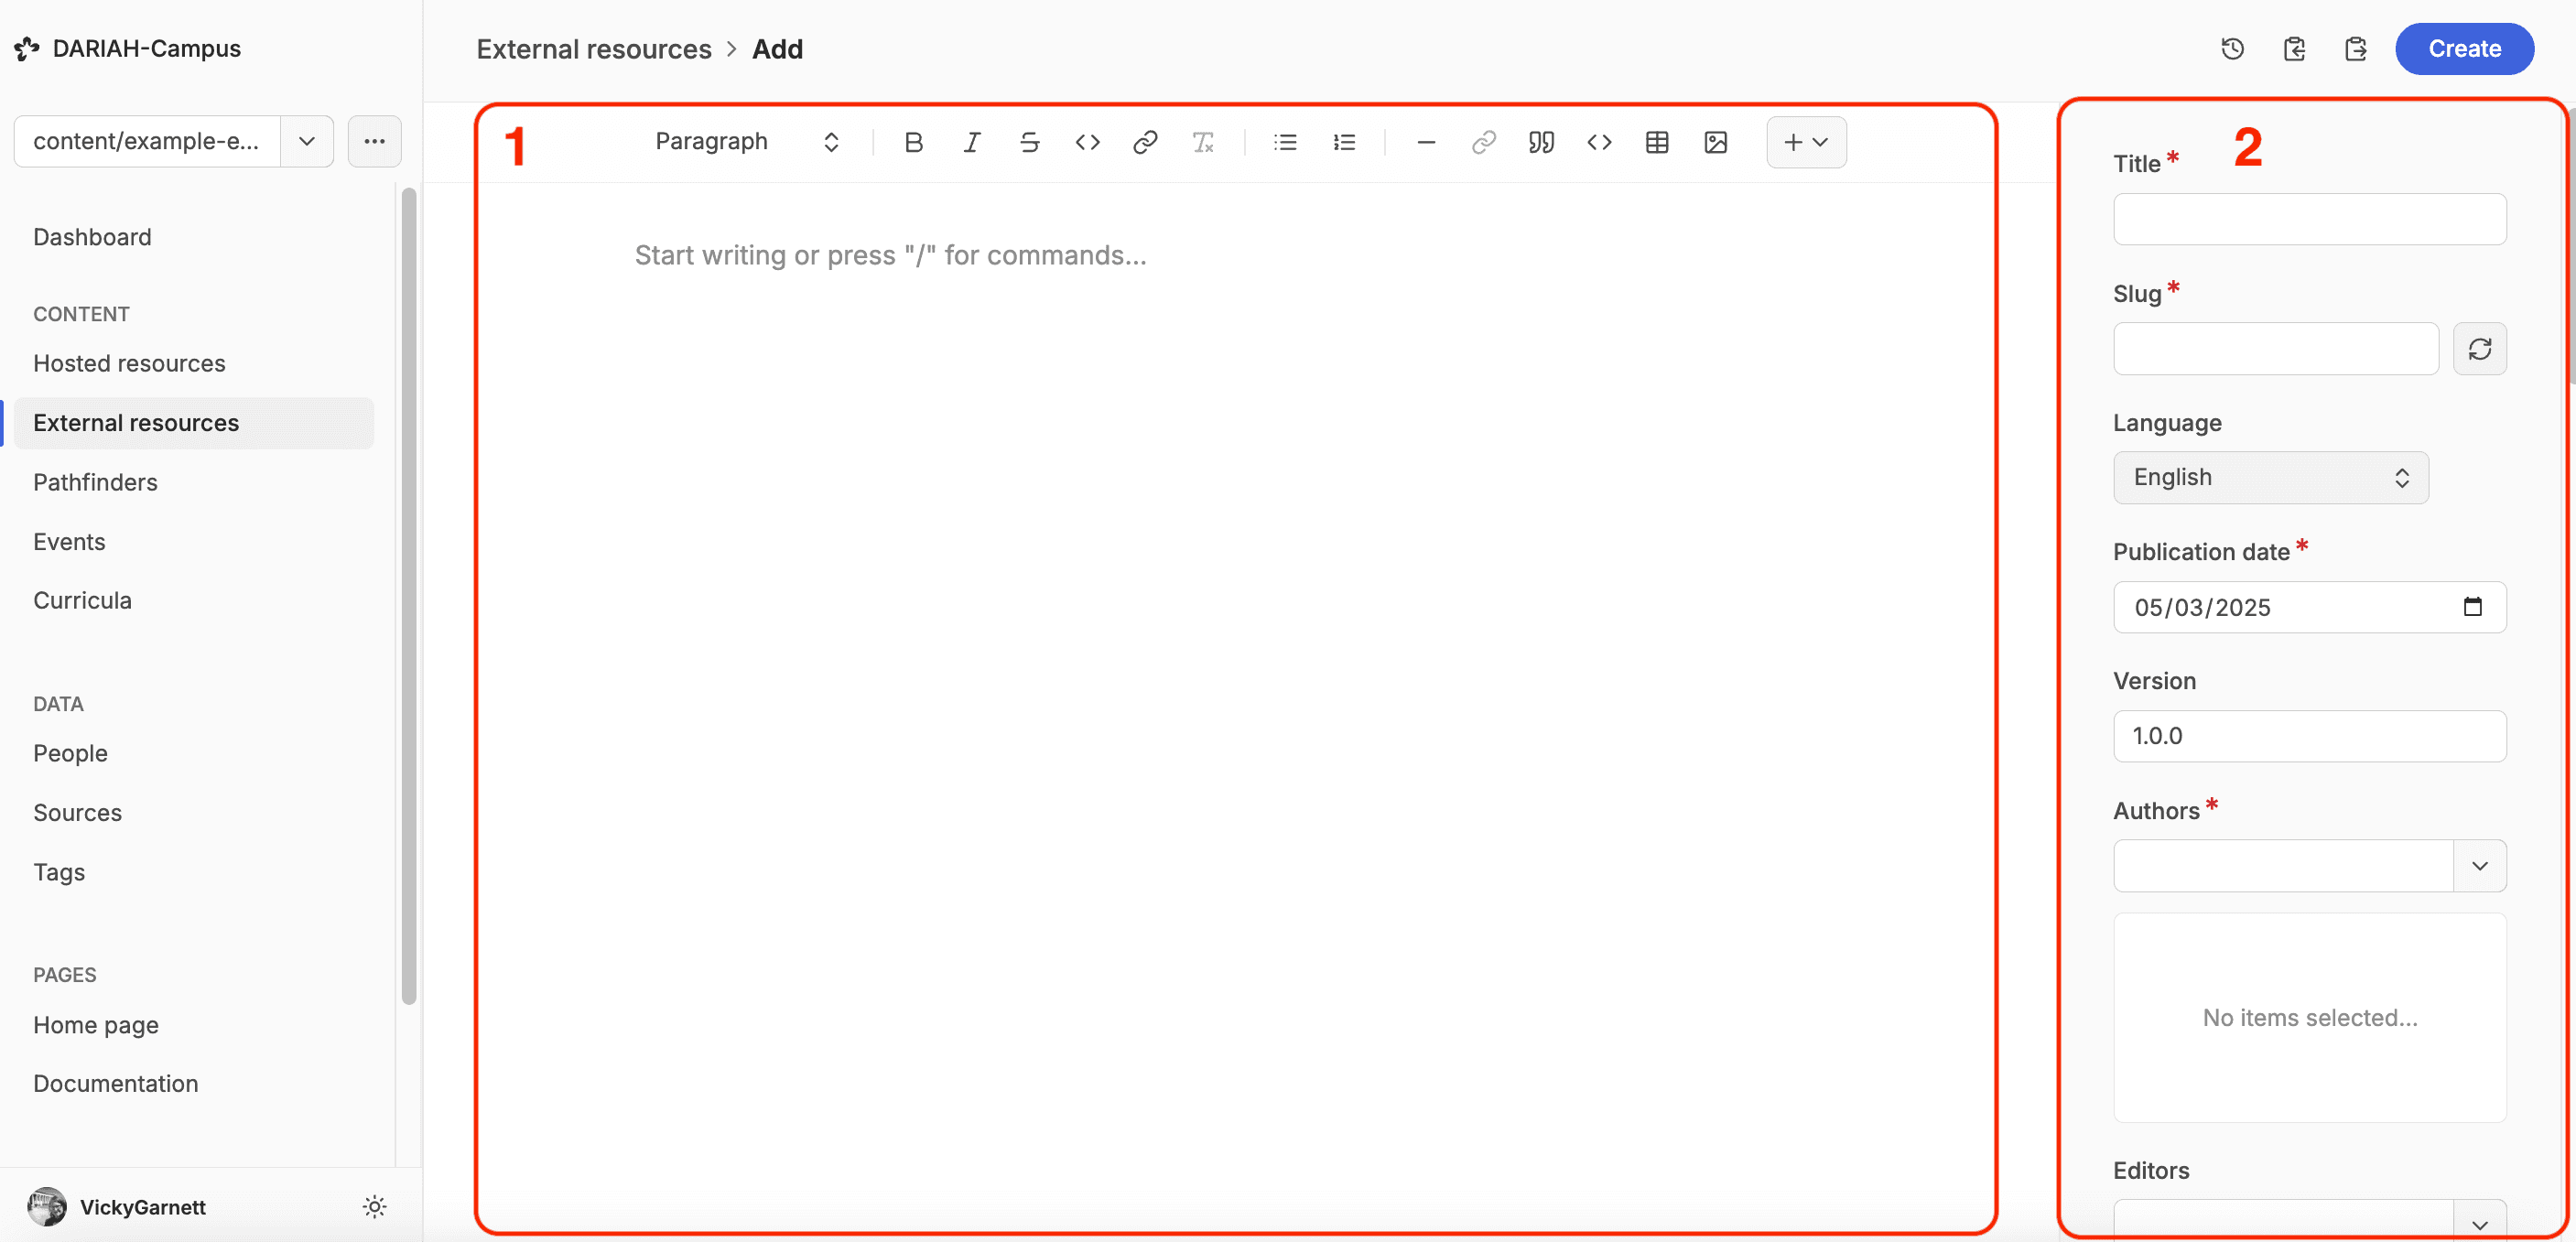
The Metadata Fields for an External Resource
The first field is the title of the resource. This in turn generates the ‘slug’ for the url of the resource, based on the title.
You can then select the language of the resource. This is through a dropdown menu. At the time of writing this documentation (March 2025) we only support two languages, but we hope this will change to allow you to add resources in other languages.
You are then asked to give the Publication Date. To be clear, there are two ‘Publication Date’ fields in the External Resource metadata. This first publication date refers to the date that this resource is published to DARIAH-Campus. For that reason it defaults to whatever today’s date is. You should leave it at this, but you might be asked to update this when the resource is ready to be published following review from the Editorial Team.
Below this is the ‘Version’ number. By default this is set to 1.0.0. However, if you are making substantial changes to a resource (e.g. major content updates, not just typos), this will need to be changed to indicate that this is a new version. For now, though, as you are creating a new resource, you can leave this at the default setting.
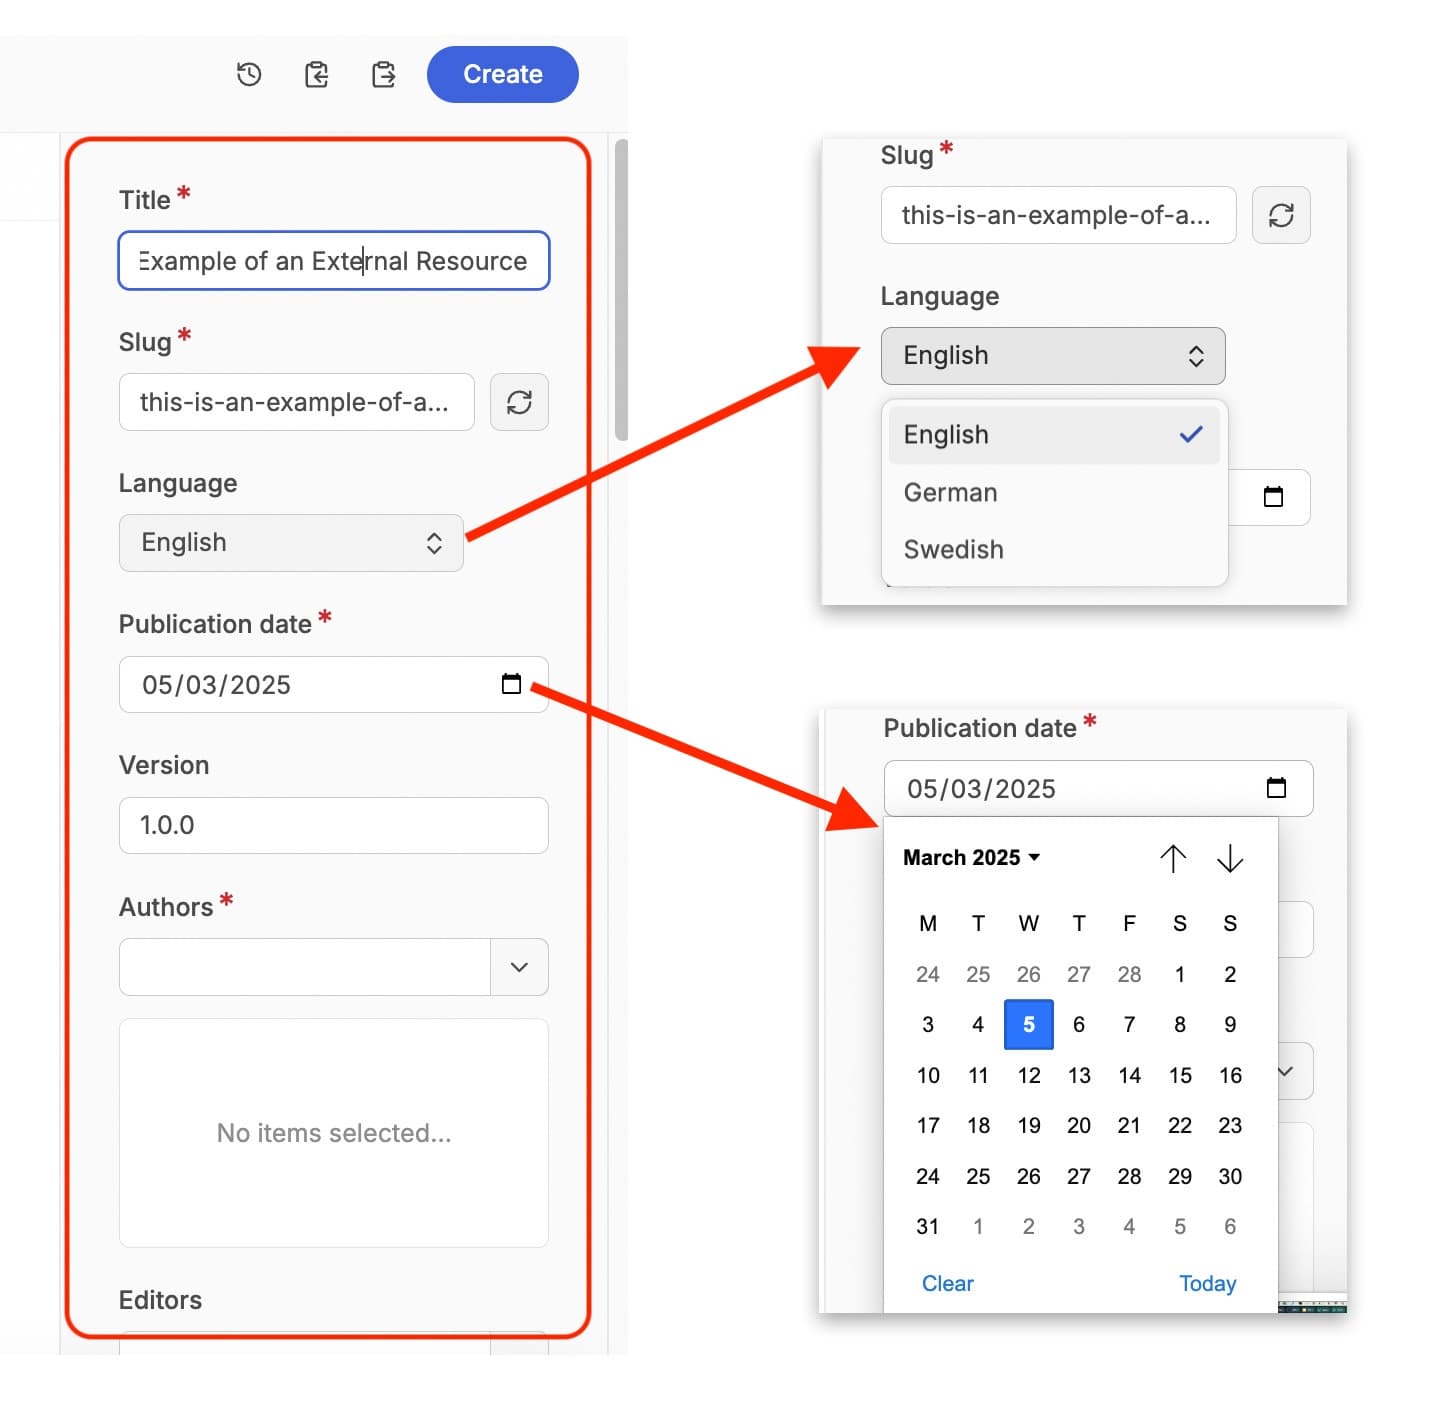
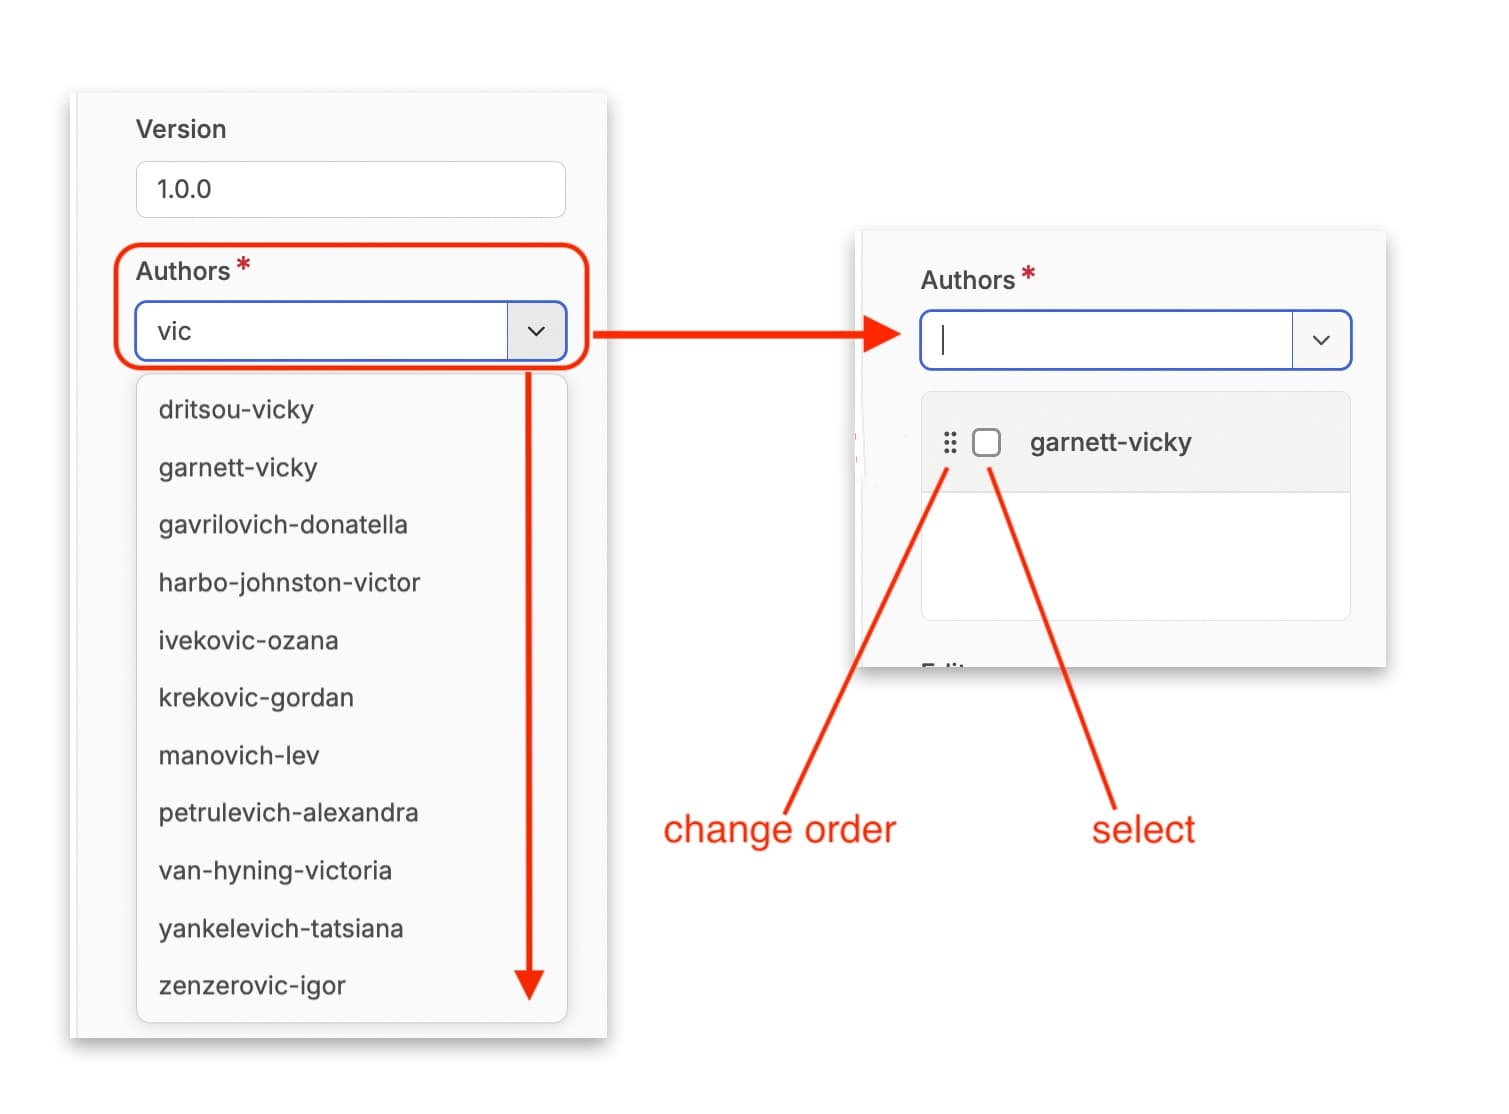
Next you will need to add the Authors of your resource. This is done using the people already published on the system. This field is both a search box and a drop down menu, but the quickest way to find someone is to start typing one or two letters of their name into the search field, and the drop down menu will filter down to only the named people with those letters in that order in their name. From there you can select which person you want to include. For resources with multiple authors you can repeat this step.
Once you have selected an author or authors, it will appear in a box below the drop down menu. For each person there is the option to change the order of authors listing, indicated by an icon featuring six dots, or the option to select that author, indicated by a checkbox, so that you can remove them from the list if required.
You can fill in the ‘Editors’ and ‘Contributing Authors’ fields in the same way.
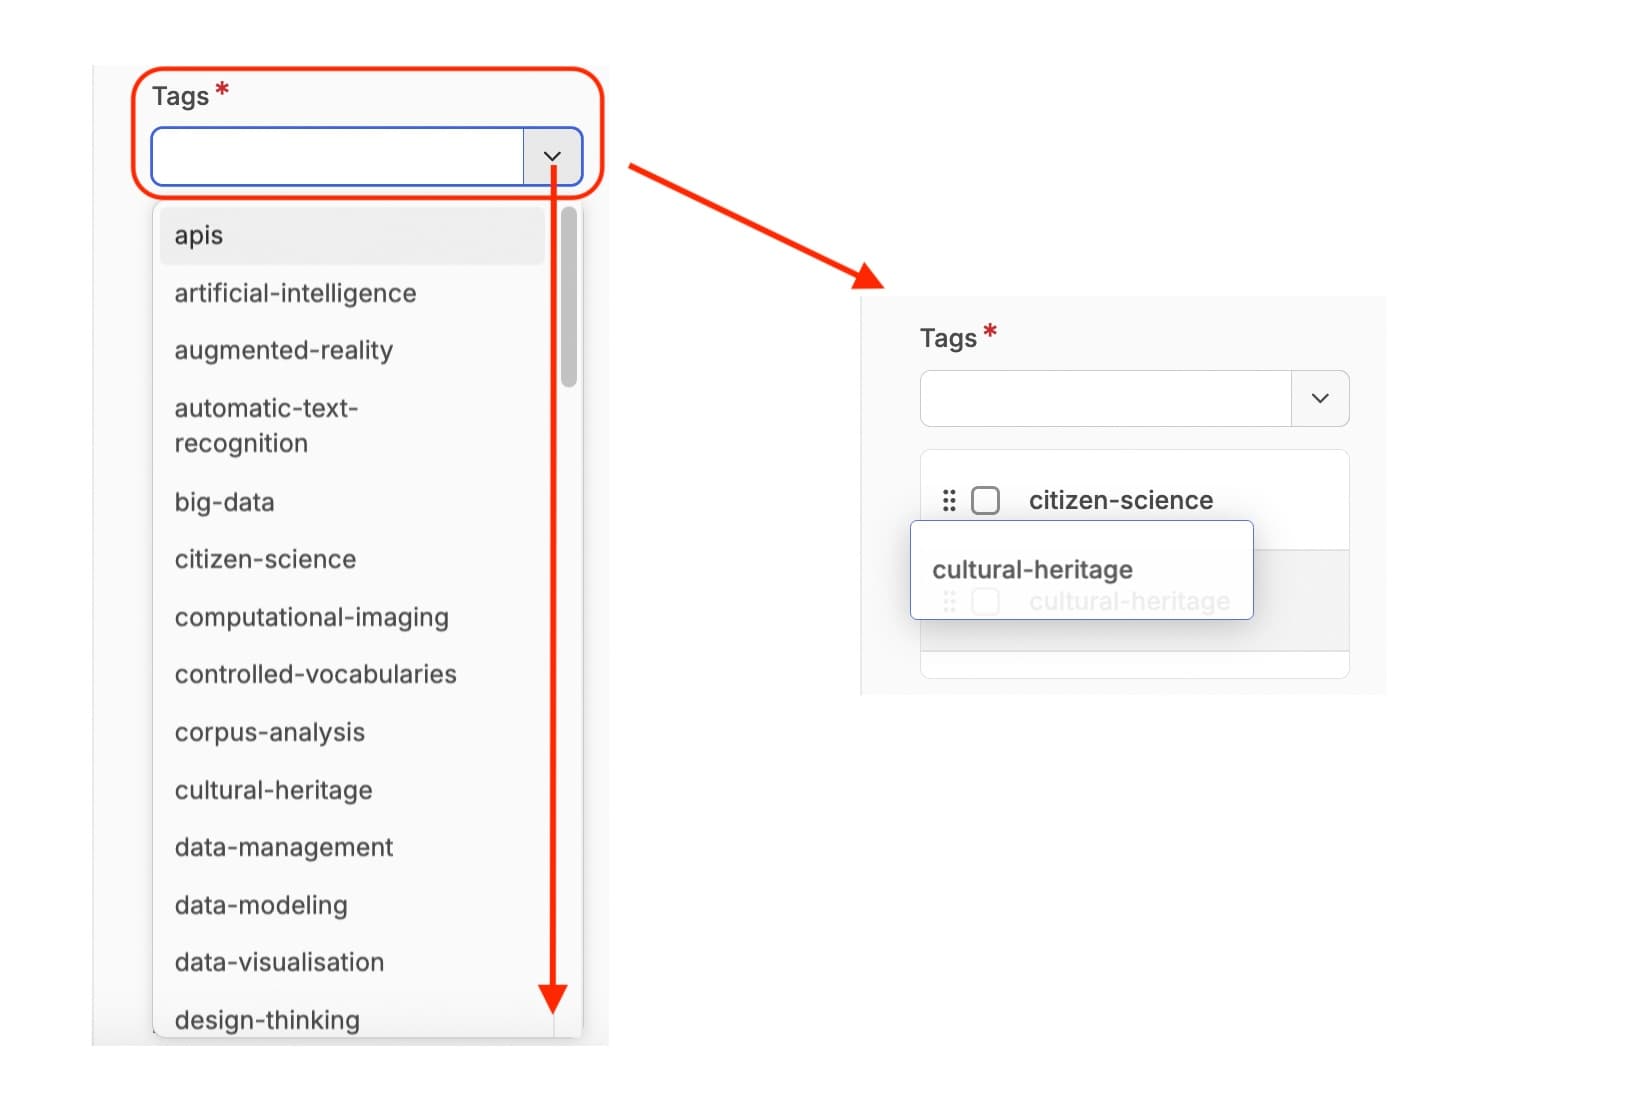
Tags are selected in the same way as authors. You can use the search field next to the drop down button to start typing a topic, and select an appropriate tag from or tags from there. You can also re-order these by clicking on the 6 dots and dragging the tag up or down the list.
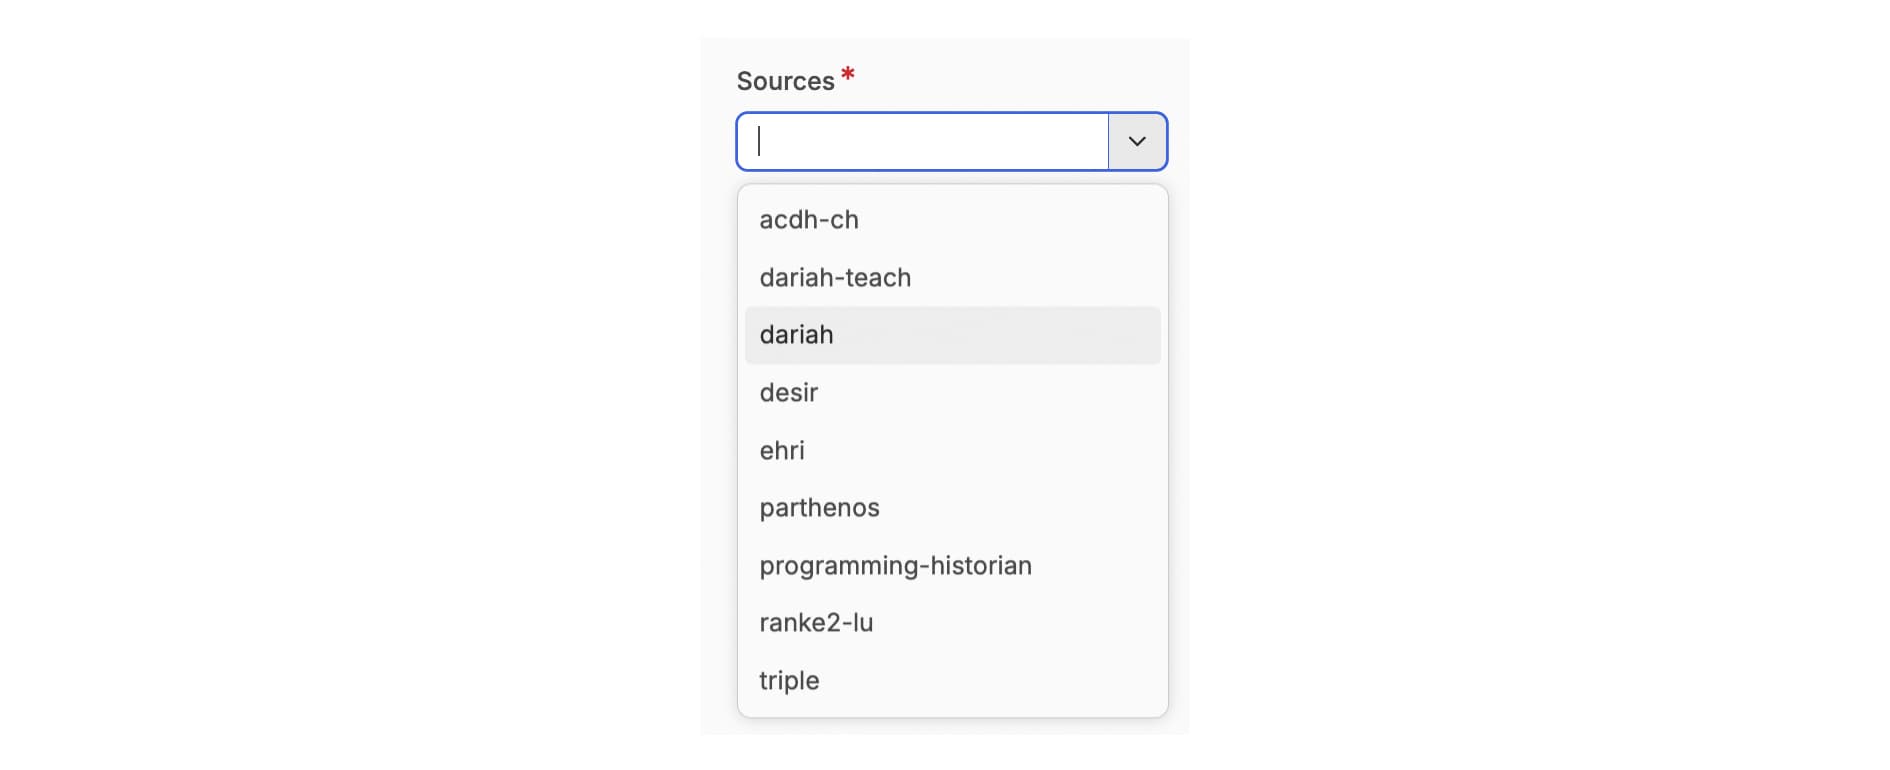
Sources are also selected in the same way. The ‘Source’ is used to assign a ‘channel’. In most cases, the source is ‘DARIAH’, unless you already have a dedicated ‘channel’ in place as agreed with the DARIAH-Campus Editorial Board.
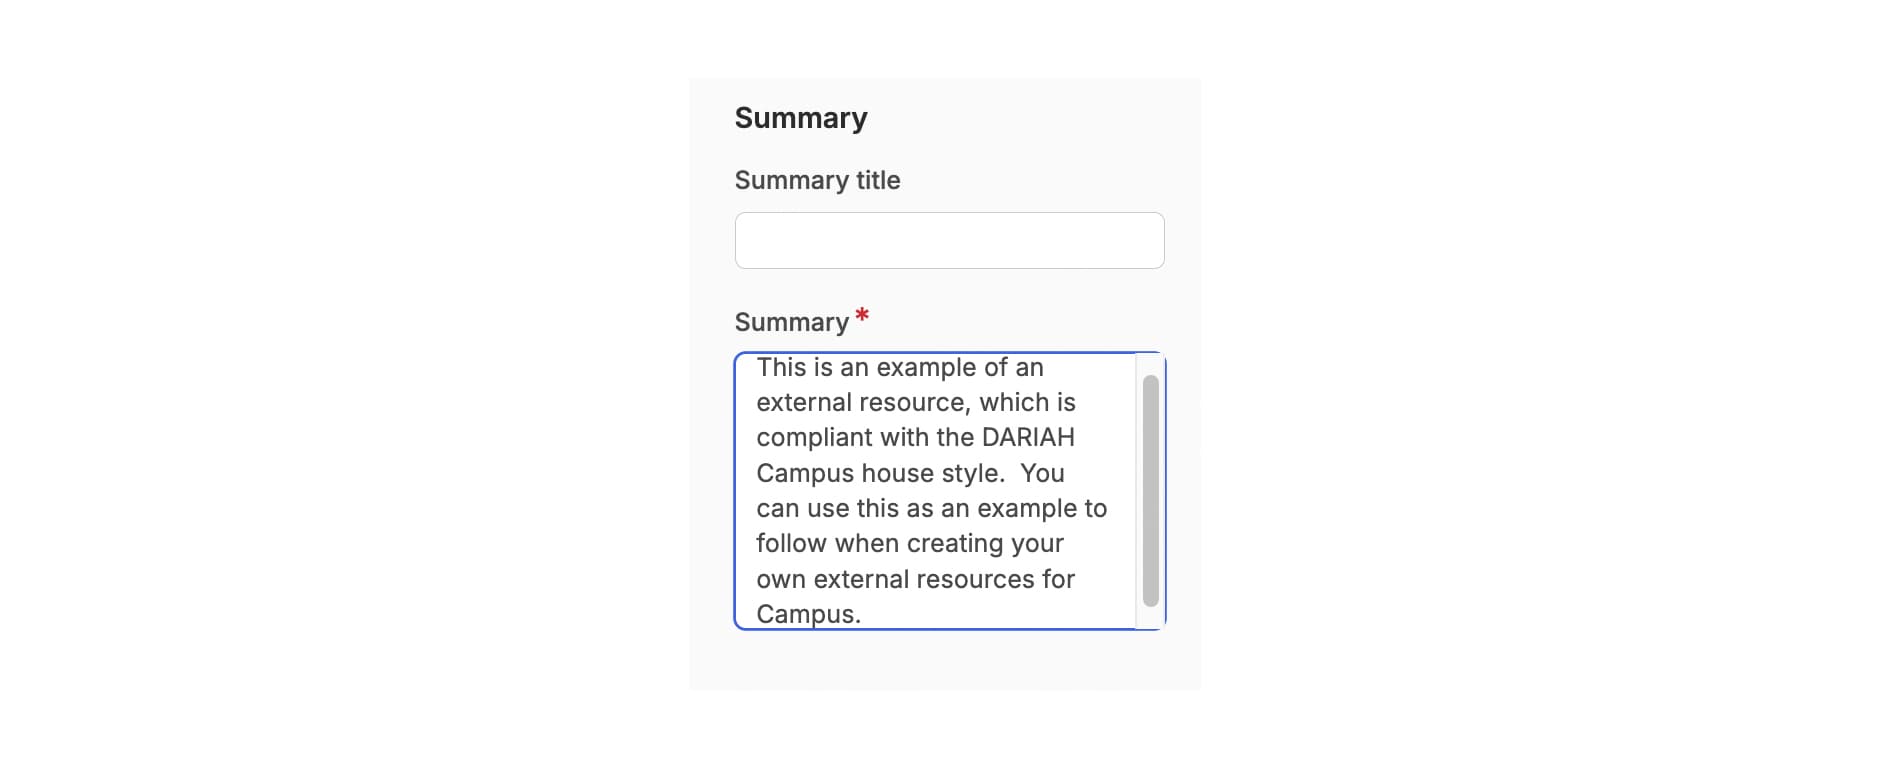
The Summary (formerly known as the ‘Abstract’) is the information that is displayed on the main ‘Resources’ page of DARIAH-Campus and offers a short preview into what the resource is about to entice the learner. The summary should be no longer than 80 words, and should describe what is covered in the resource.
If the title of your resource is very long, you can also use the ‘Summary Title’ field to write a shorter, but still meaningful, title, and this will display on the Resources page.
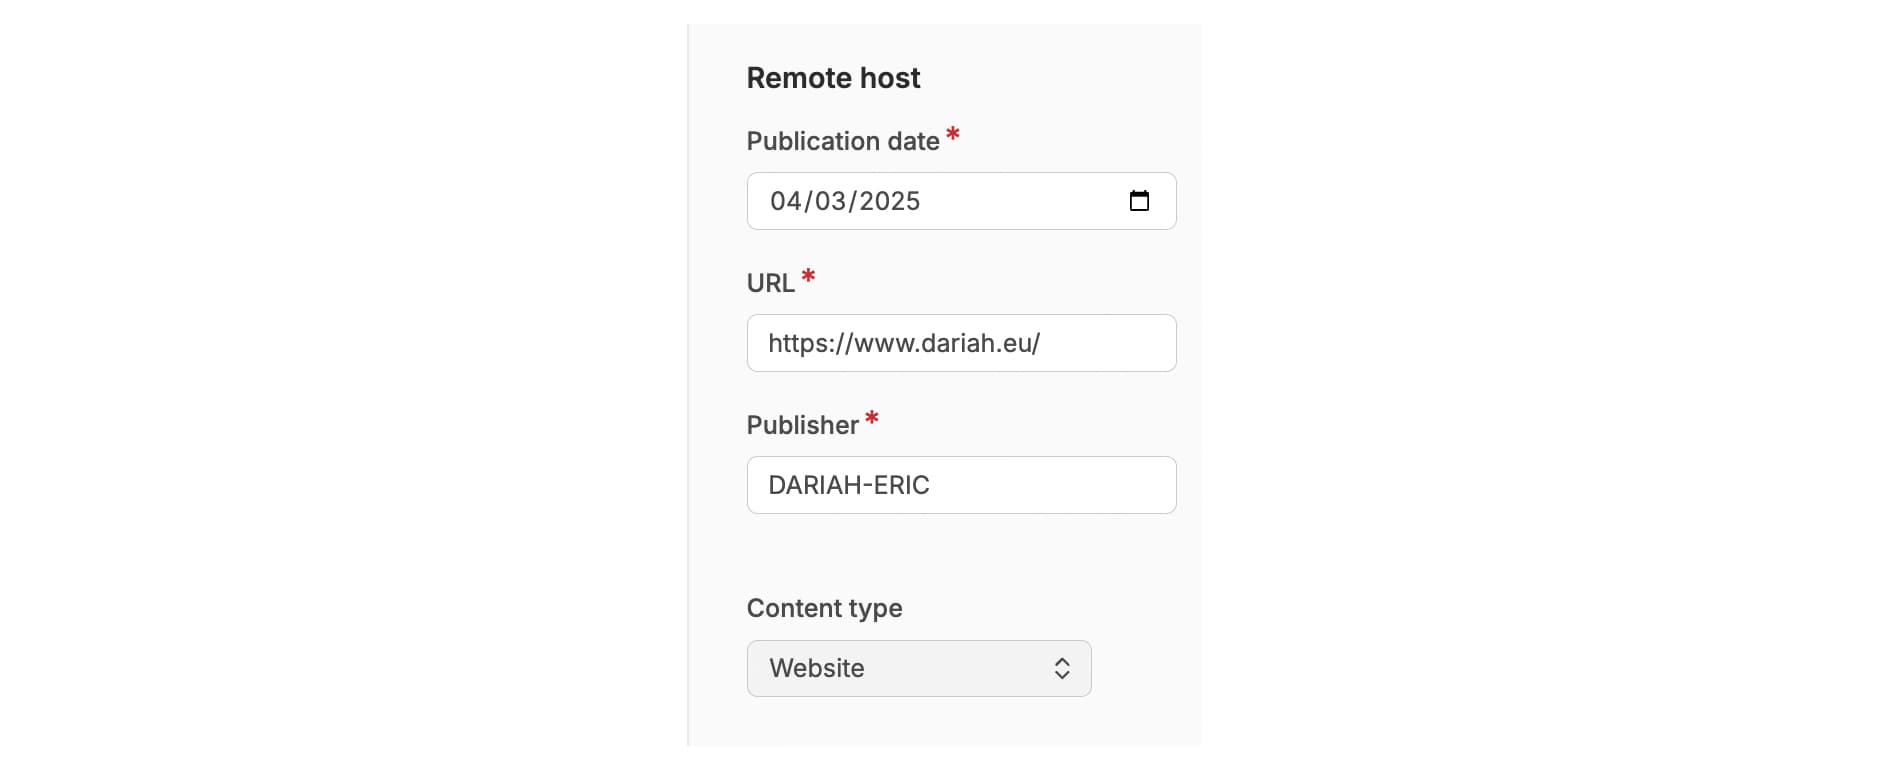
In the last section of the metadata, we have the ‘Remote Host’ data. This is what distinguishes an External Resource from a Hosted Resource, as this section of the metadata covers the information from the original publishing platform. All this information is used as part of the citation that is generated by DARIAH-Campus for your resource.
This is also where you will find the second ‘publication date’ field. This time, this field refers to the date that the resource was FIRST published, and will be a date in the past.
You will be asked to provide the URL of the resource so that it can be used in the automated citation that is generated, and also the name of the Publisher. This could be the name of a project, research infrastructure, or academic institution, for example.
Finally, you will be asked to select from the dropdown menu what type of resource it is, for example, is it a podcast, a website, or a webinar?
That concludes the metadata for the resource. Now you can start writing the more descriptive information.\
Writing the Descriptive Content for an External Resource
The large middle window of the screen is the field for writing the more descriptive content for your resource. You type directly into this field, and can use the formatting options available to you to ensure it matches the House Style.
You should begin with a paragraph or two (or three, if you like!) to describe the resource itself. This should be more elaborate than the summary, giving the prospective learner enough information for them to make their minds up if this resource is for their learning needs. You can add information such as the format of the learning resource, for example whether it’s a webinar, a full multi-module course, or a short one-module course. You can describe what topics are covered in the resource, and what self-assessment tools (if there are any) they might use to check their learning.
In addition, you are also required to provide learning outcomes that learners can reasonably expect to have once they have completed the resource. Learning Outcomes should sit beneath the description of the resource, and before the ‘External Resource’ widget is added.
Do note, learning outcomes are different from learning objectives. If you need some help in writing learning outcomes, you can take a look at the guide we have provided here.
You will also need to format the heading for ‘Learning Outcomes’ accordingly. Within our house style, ‘Heading 2’ is always applied to this. The individual learning outcomes are also put into a bulleted list. This list should be preceded by the unfinished sentence “After completing this resource, learners will be able to”, allowing the bullet points to complete the sentence.
Below the ‘Learning Outcomes’ you should now add the ‘External Resource’ widget. All the widgets for resources can be found by clicking on the dropdown menu indicated with a plus sign on the end right of the formatting options. From this dropdown menu, select the ‘External Resource’ option.
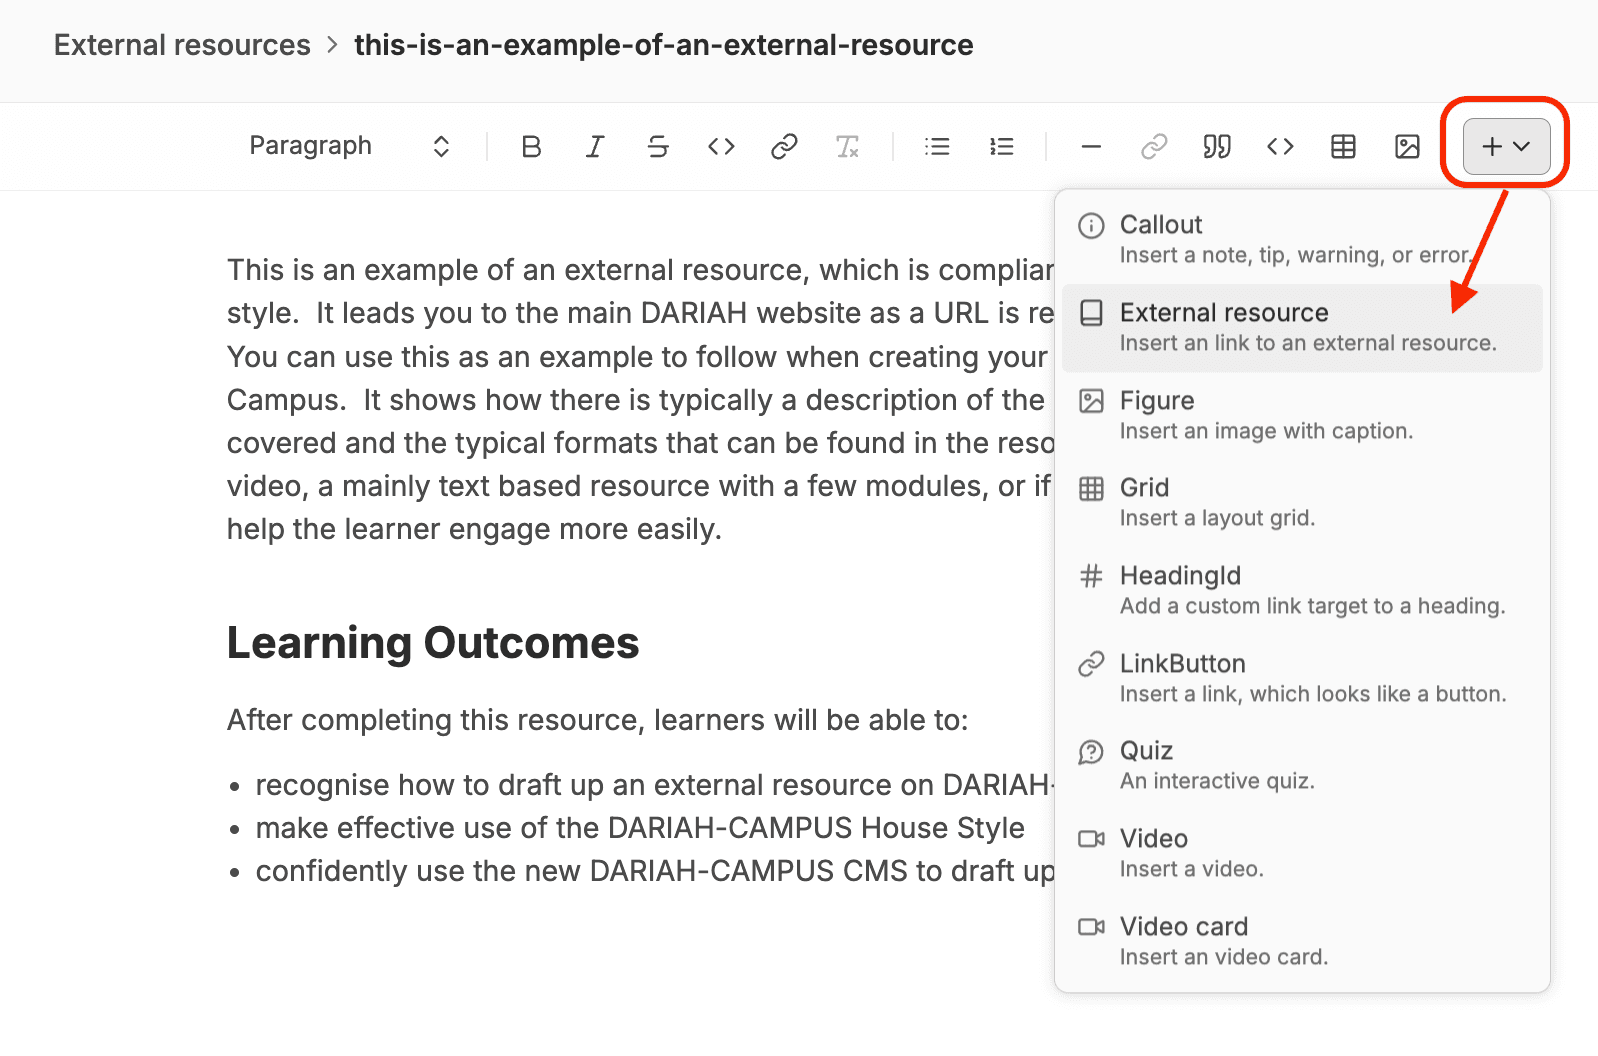
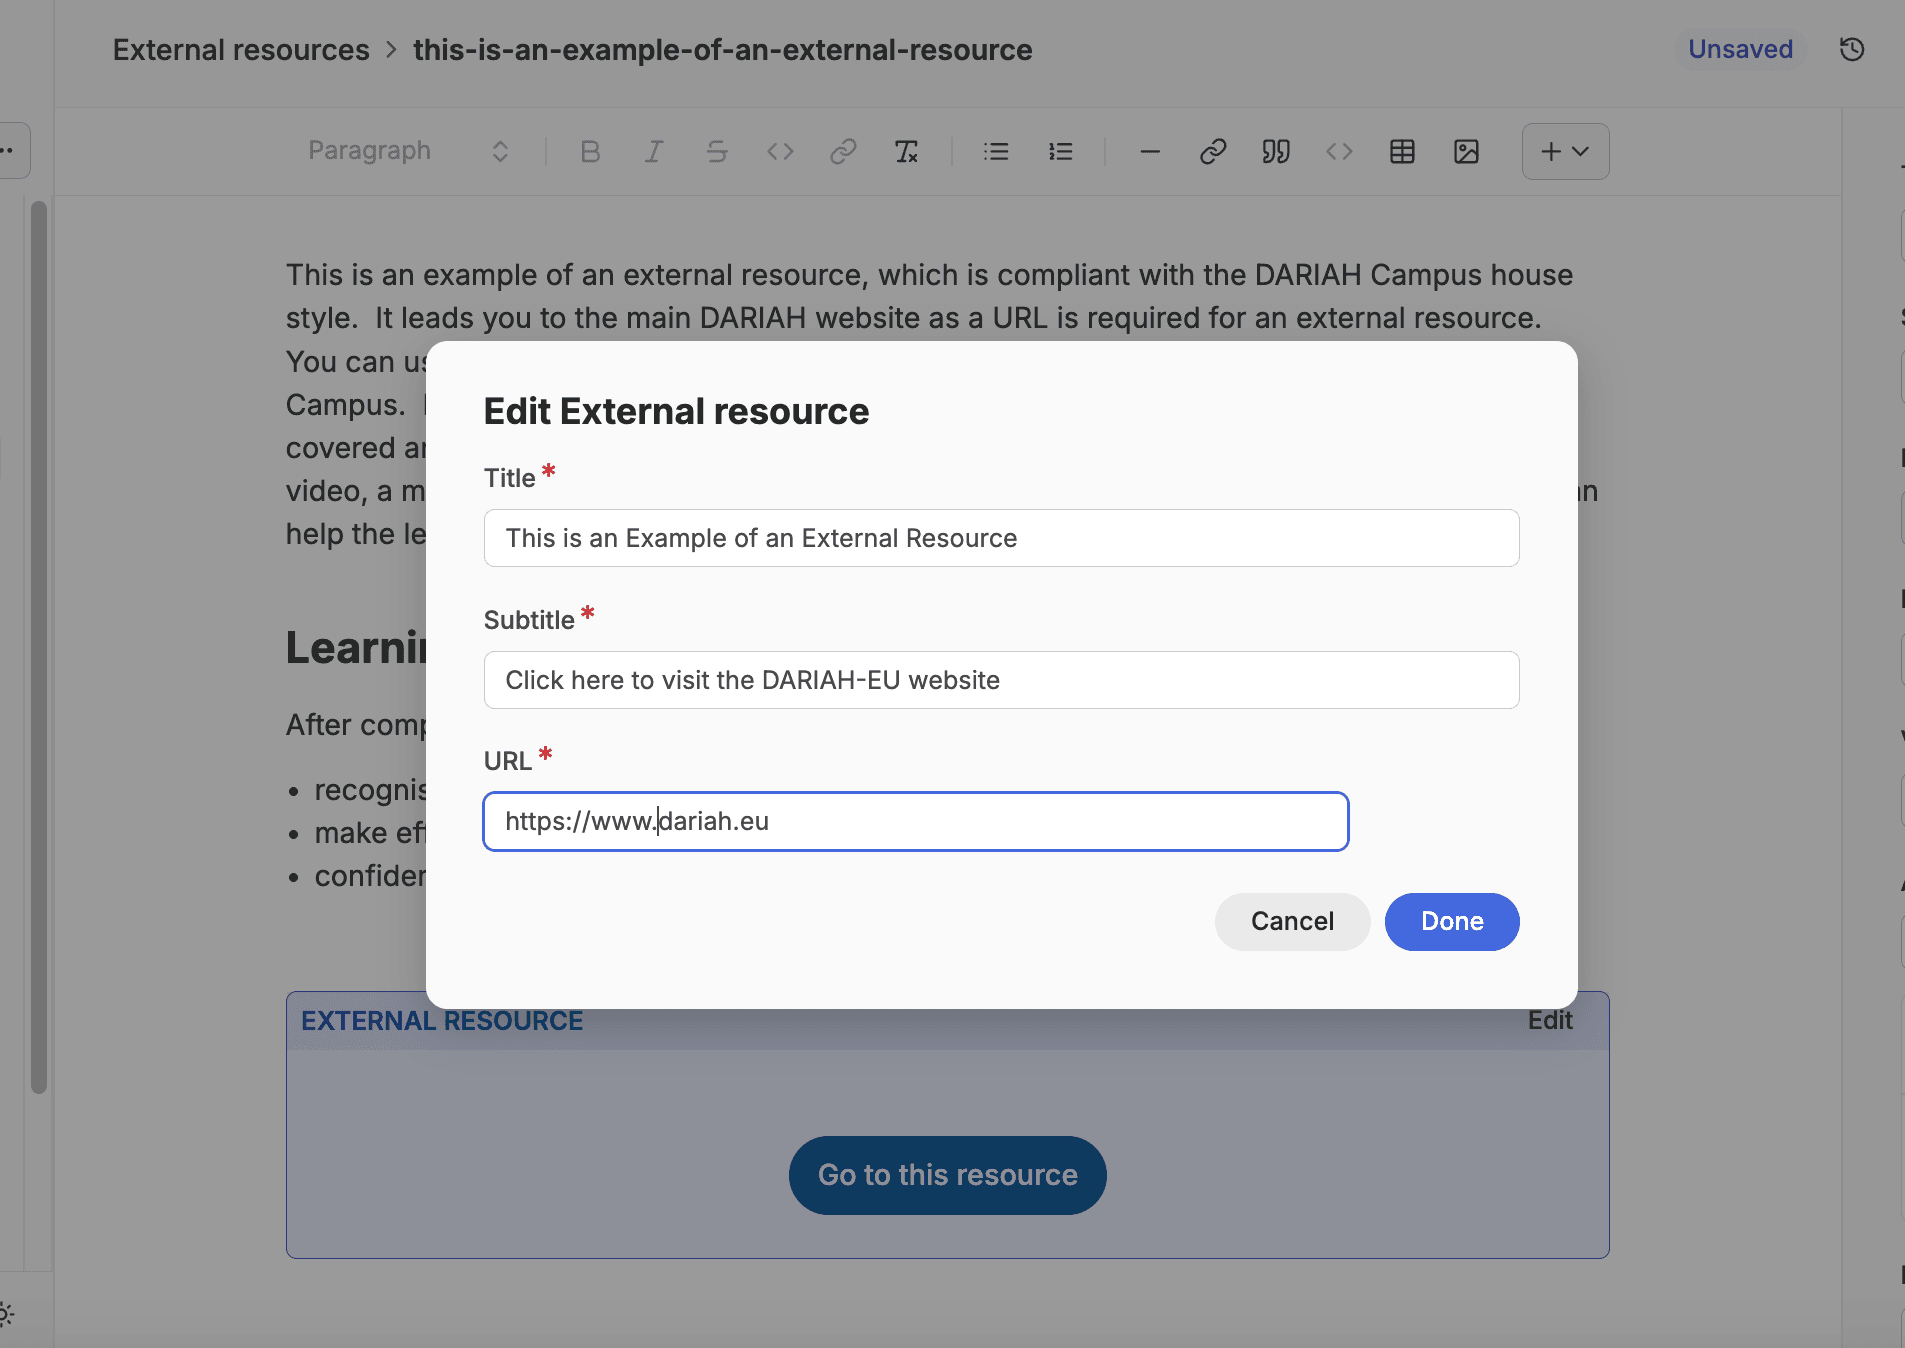
A placeholder box for an External Resource will appear in the workspace. Click on the ‘Edit’ button, and a pop-up window will appear asking you for additional required information. In the ‘Title’ field, you can enter the resource title. You can shorten this to the ‘Summary title’ you may have used in the metadata if the full title is really long.
You are also asked to provide a subtitle. We prefer that you use ‘Click here to visit the [INSERT NAME OF PUBLISHER] website’.
Finally, you need to once again add the URL of the resource. In this instance, the URL is used to create a hyperlink in the button graphic that is displayed on the page once it’s published.
Once you are happy with all the information, you can click on ‘done’, and it will take you back to the main editing page.
You will now see the ‘external resource’ box with all this information entered into it.
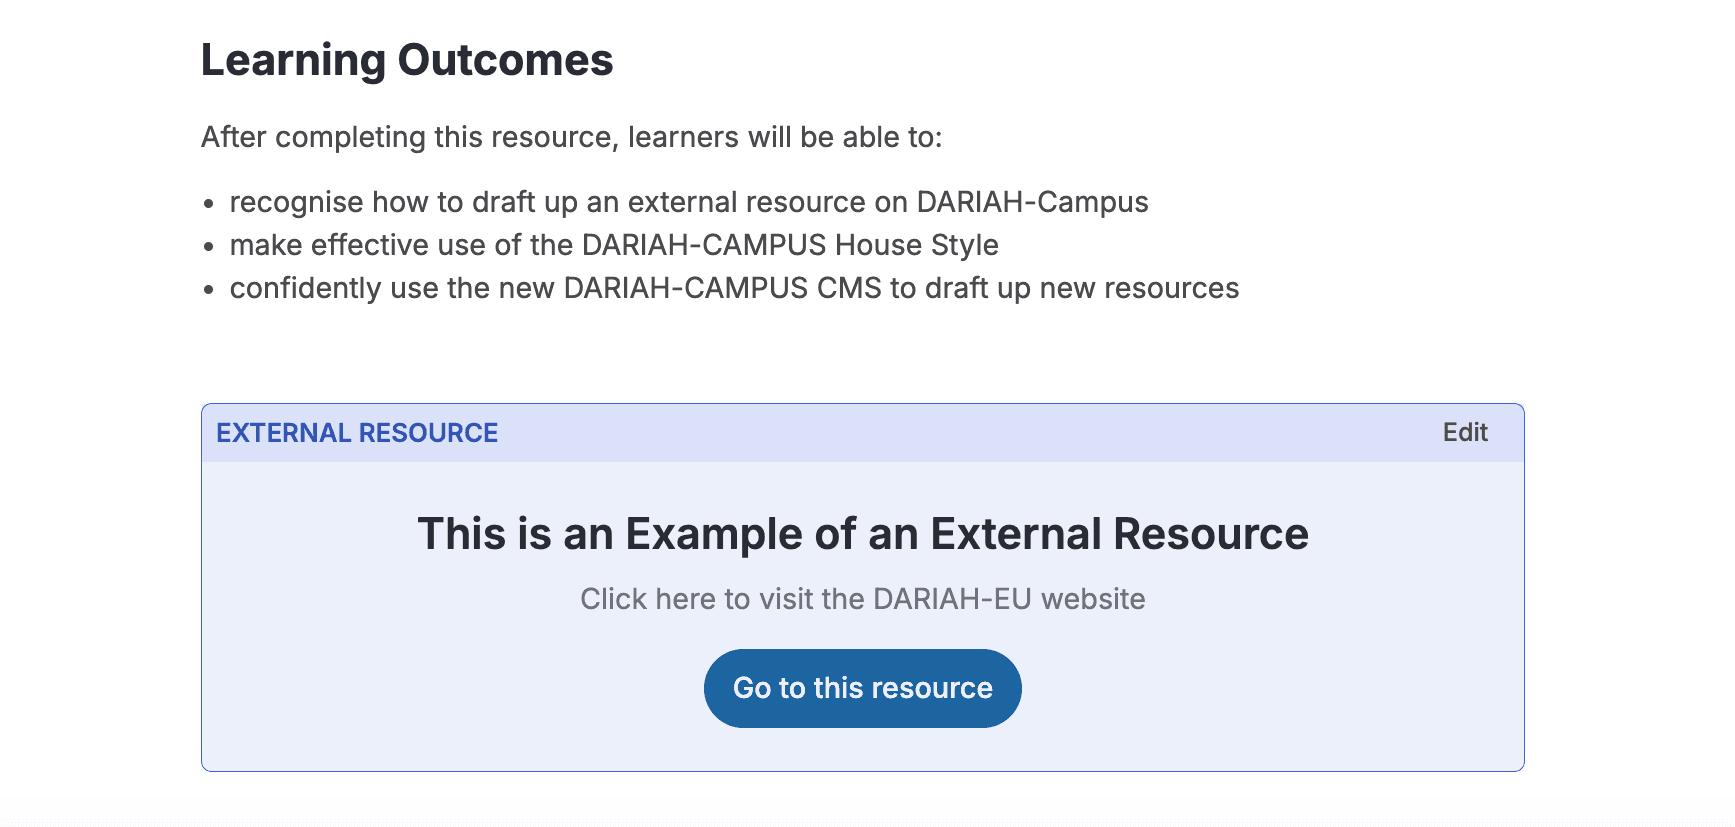
And that is the widget created!
Saving Your External Resource Draft
At this point, you may wish to ‘Create’ a pull request, and save your work. You can of course do this at any point in the editing process once the required metadata has been entered. In the case shown in the figure below, this was done before adding the ‘External Resource’ widget. When you choose to create the pull request and save your work is up to you, depending on your own practices, although we recommend saving frequently after a set of changes to ensure nothing is lost in the unlikely event of a website crash, or if you have to step away from your computer.
To create a draft, click on the blue button in the top right-hand corner of the screen saying ‘Create’.
Once you do this, a green message will display momentarily at the bottom of the screen saying ‘Entry Created’. The blue button will now change to say ‘Save’.
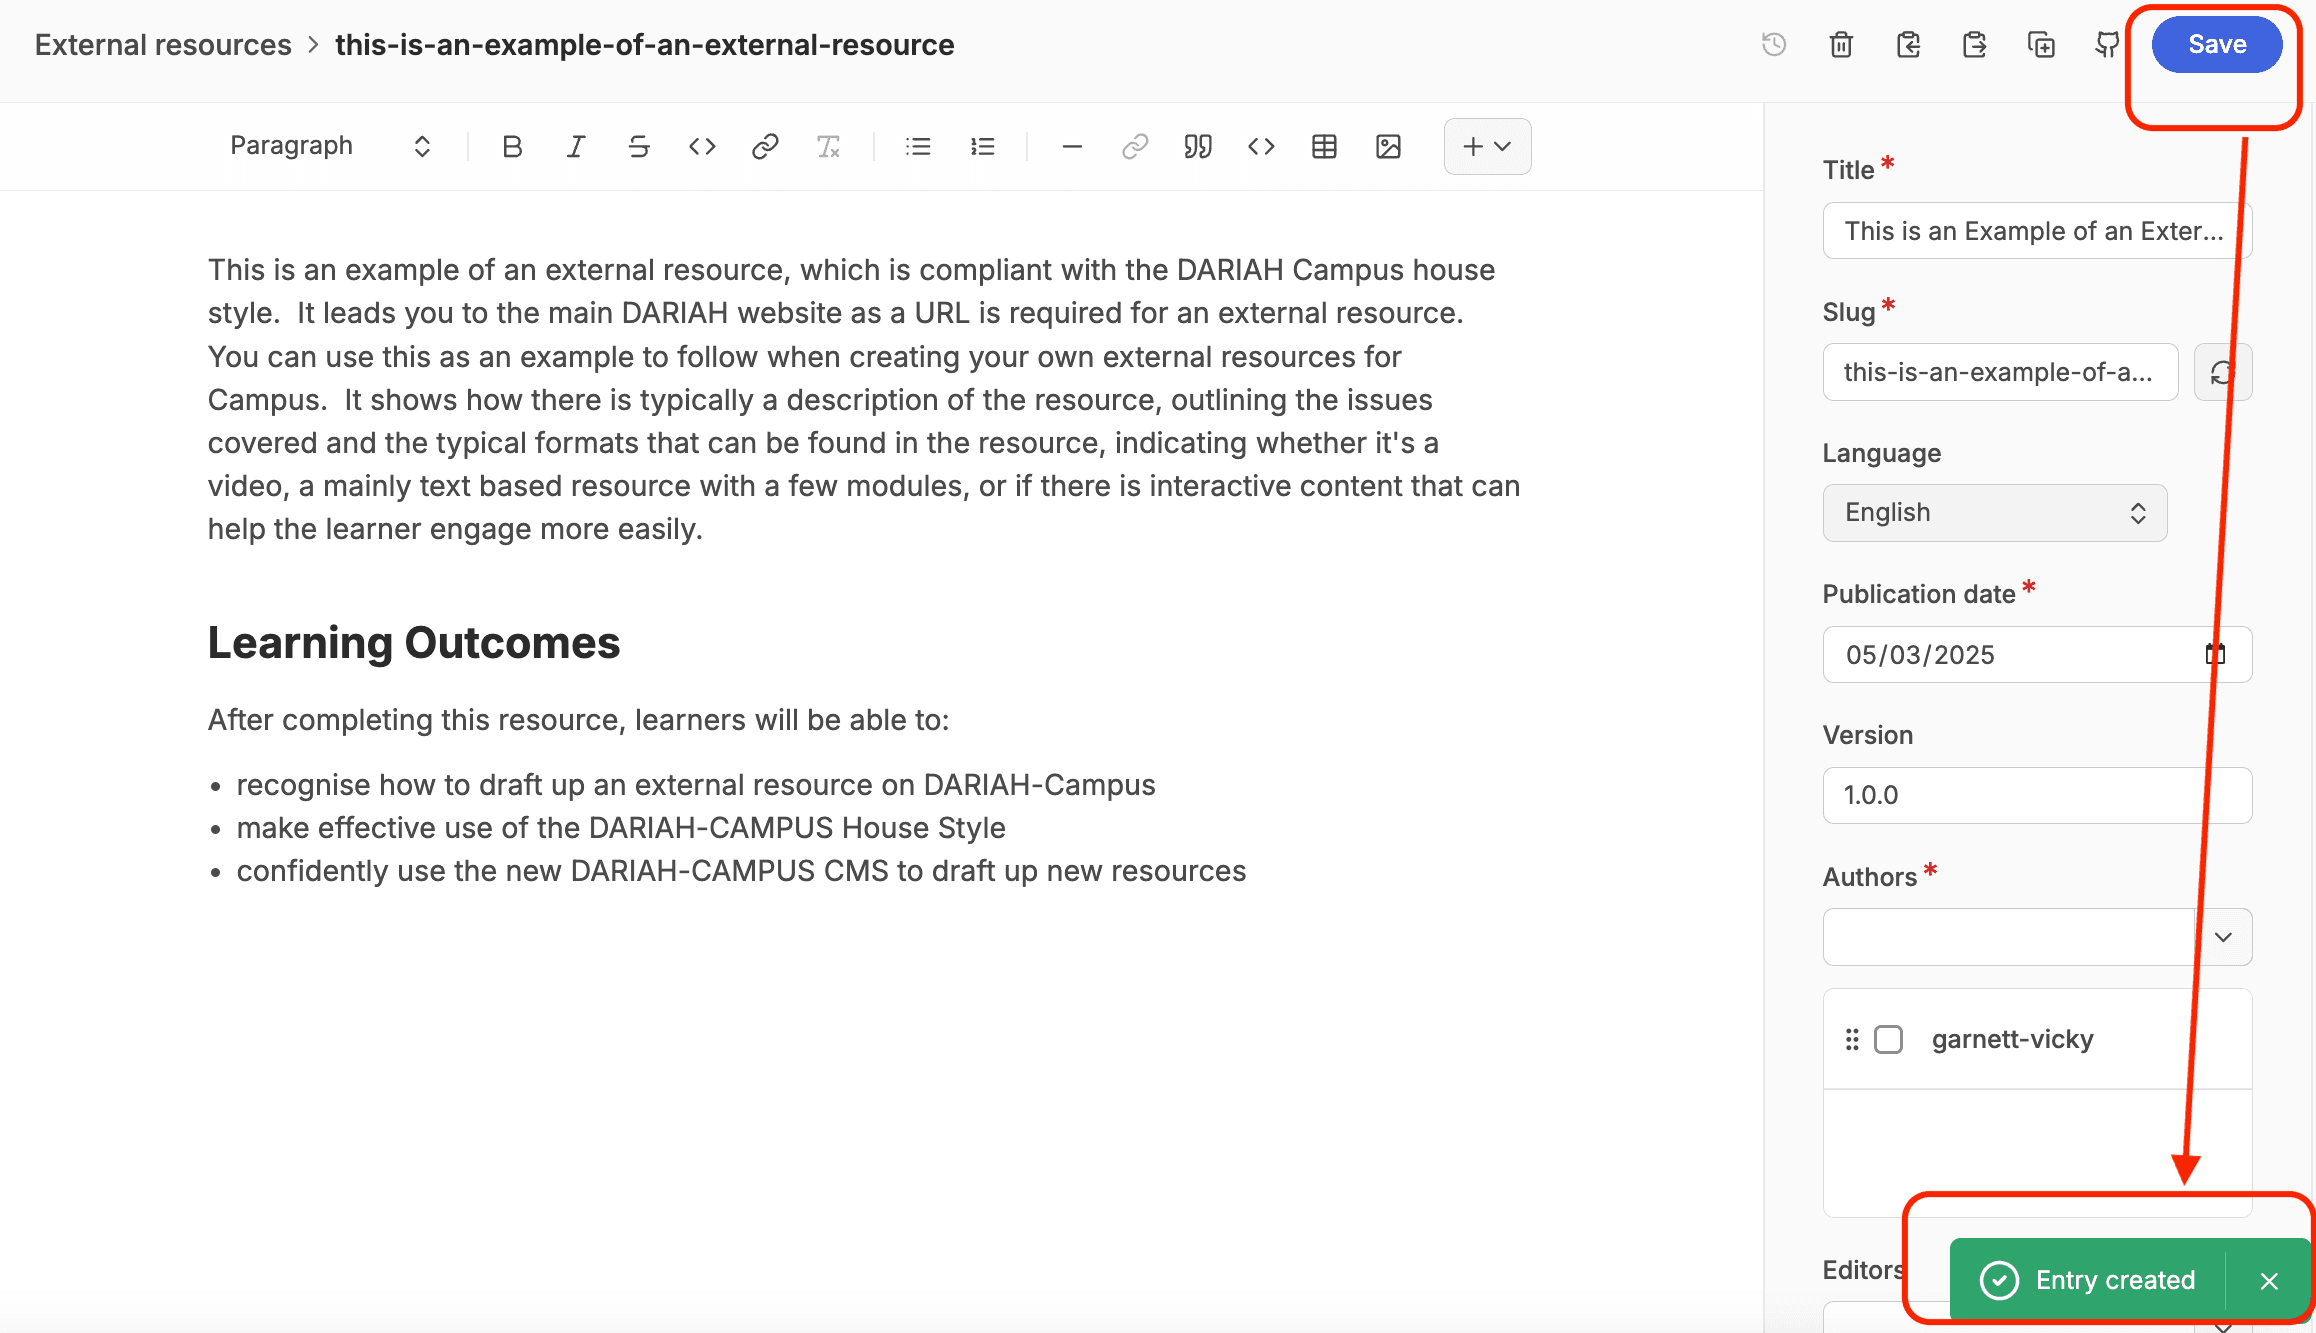
Now you have saved your resource, and are happy that it has all the information you want to include in there, you can save the resource again, and then move to create a pull request.
This is the same process as shown before, but as a reminder…
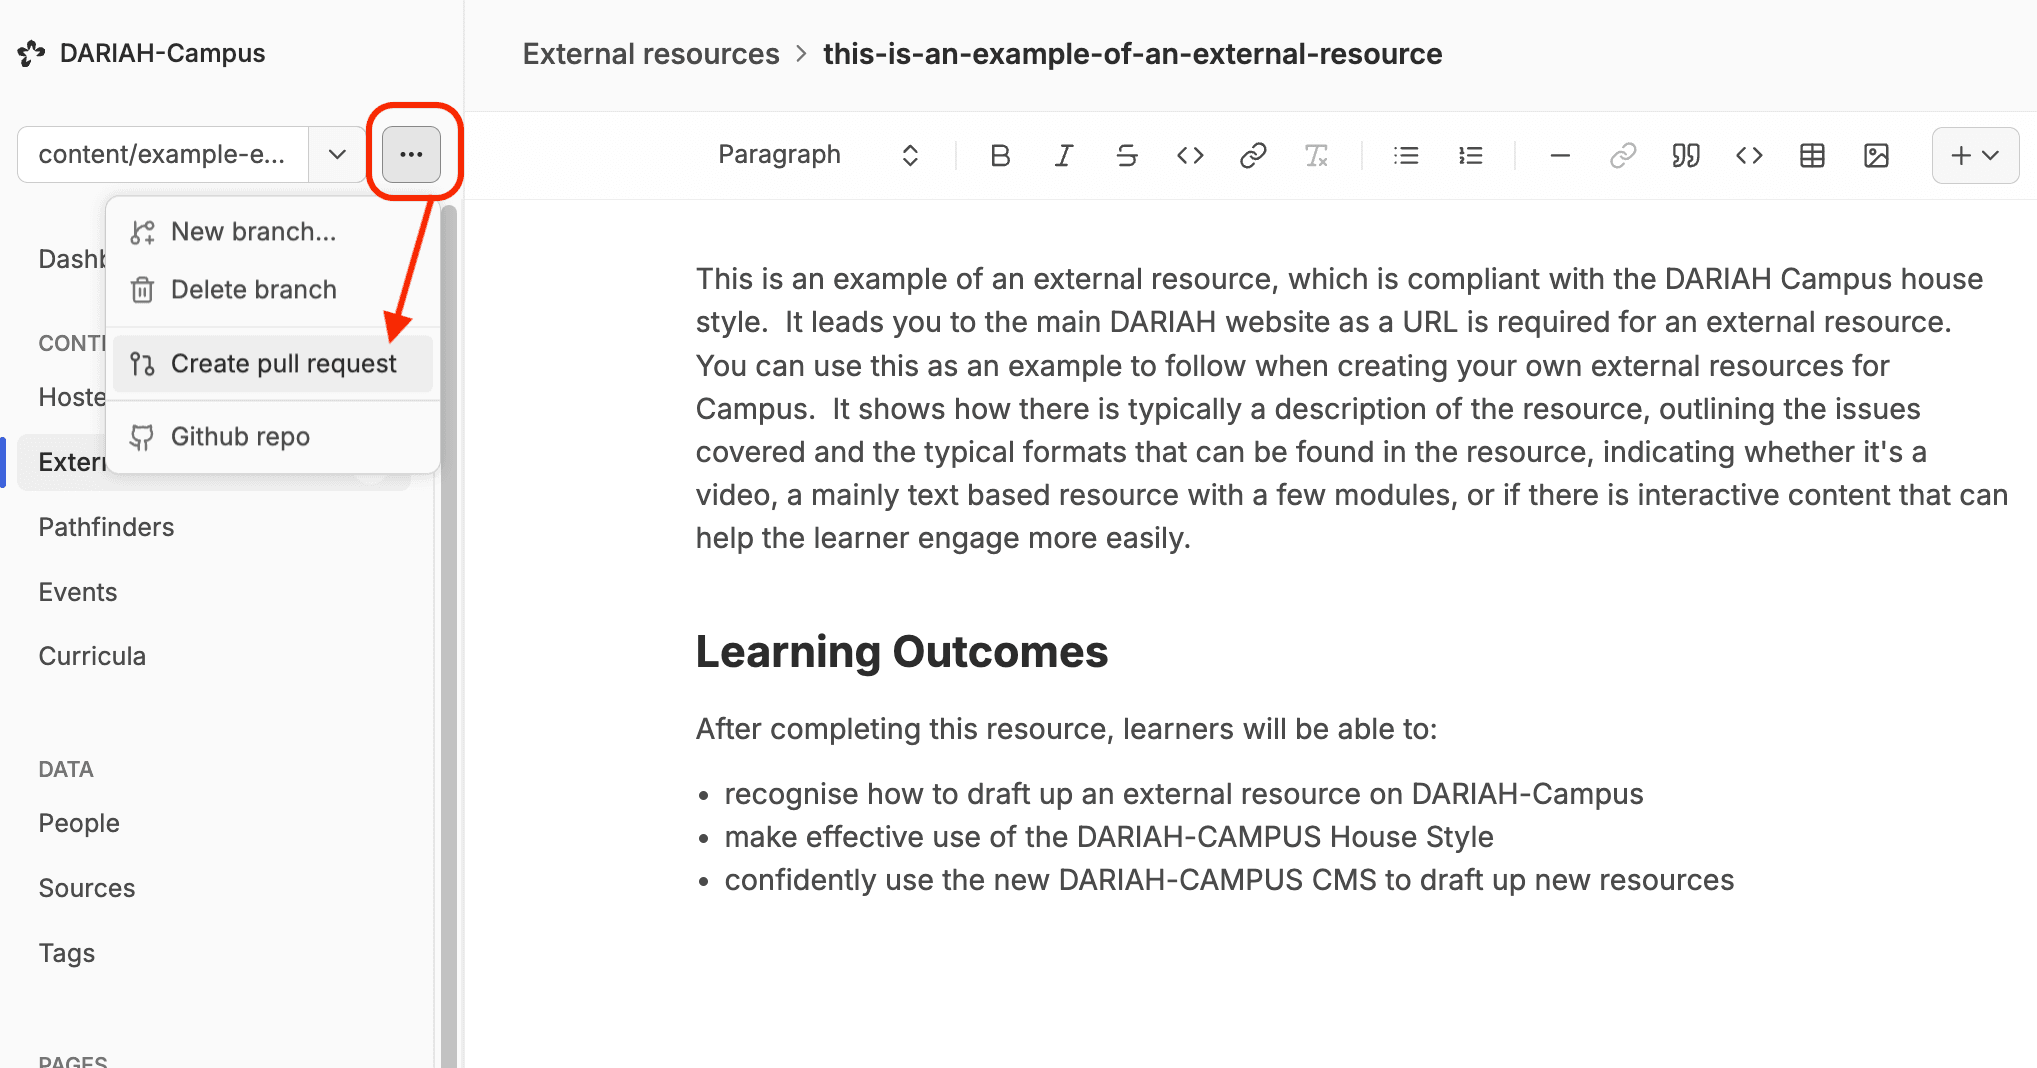
Click on the ‘Branch Options’ button (three horizontal dots, next to the Branch Dropdown menu), and select ‘Create Pull Request’.
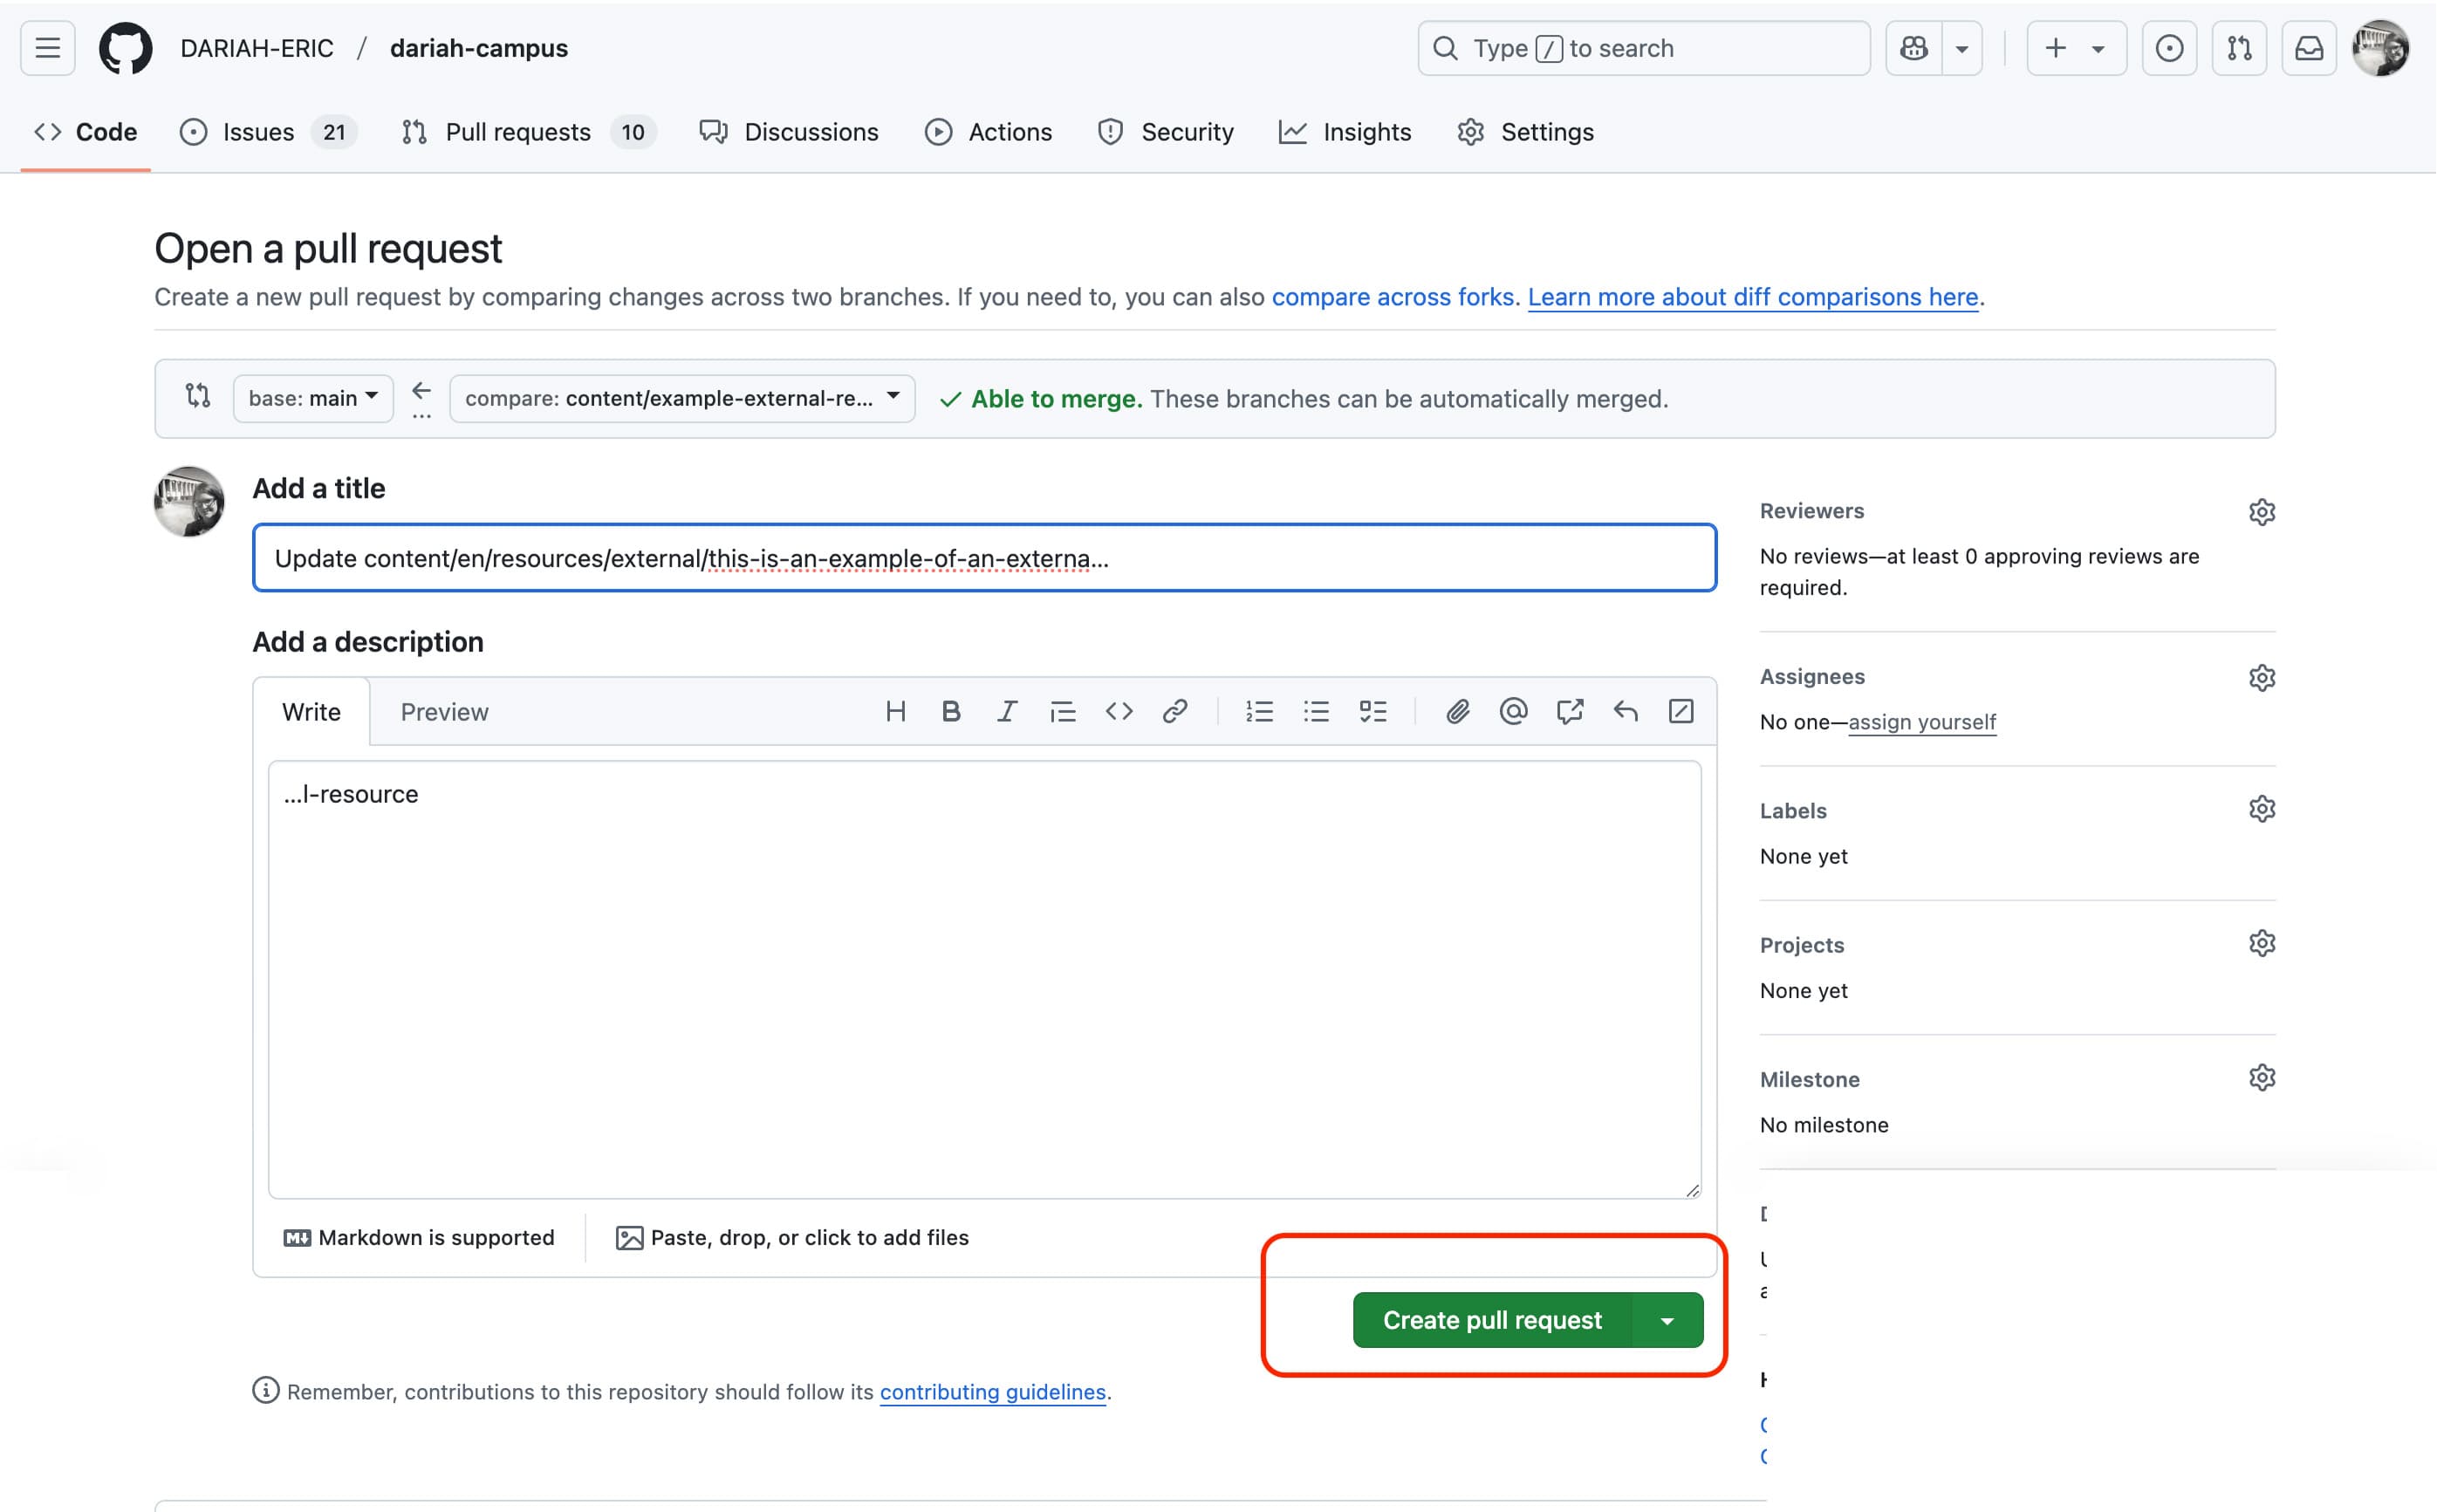
This will bring you to the GitHub site, where you can create the Pull Request by clicking on the green button halfway down the page saying ‘Create Pull Request’ (depending on your screen size, you may have to scroll down to see this button).
The screen will now change to show you the actual pull request that your draft is filed in on GitHub. After a short while, a ‘Vercel bot’ will post an automatic message to the Pull Request which includes a table showing a summary of the latest updates. In this table you will see a link to ‘Visit Preview’. This link will always bring you to the latest successfully built preview of your resource. You can click on this to see how your resource looks on the DARIAH-Campus website. Do note, this is only a preview link, and should not be shared in any official capacity.